How to connect OTRS with GitLab
Robert Ullrich15. Sep 2017 | ConsultingMiscellaneousUse cases
Disclaimer:
The practical examples presented in our technical blog (blog.otrs.com) and now in the expert category in our FAQ blog section serve as a source of ideas and documentation to show what is theoretically possible with OTRS in concrete scenarios or sometimes even for more exotic configurations. All configurations presented here were developed under laboratory conditions as a proof of concept.
We can only guarantee testing and implementation of these concepts to be error-free and productive if implemented in a workshop with one of our OTRS consultants. Without this, the responsibility lies with the customer himself. Please note that configurations from older OTRS versions may not work in the newer ones.
With the OTRS Business Solution™ 5s, you have the possibility to connect OTRS with GitLab. The following article will explain how to configure the GitLabConnector to establish a connection between OTRS and GitLab.
To complete this Howto, you need a running OTRS & GitLab system. Furthermore, you need a valid user login and the “private_token” of the user which should be used for the integration. The REST/JSON API of GitLab is activated by default.
Use case for this connector
The GitLabConnector can be used in software developing companies, where the customer service team is using OTRS for the requests of customers and the development department is using GitLab for maintaining the source code, work on open issues a.s.o. To improve the communication (and to prevent agents to work on two different systems) you can use the GitLabConnector of this article.
OTRS Requirements for this HowTo
OTRS Framework
- at least OTRS 5.0.x
OTRS Packages
You need the following Freely selectable Features of the OTRS Business Solution™ 5s :
- OTRSGenericInterfaceInvokerTicket
(Adds new invoker for TicketCreate and TicketUpdate in the GenericInterface.)
- OTRSGenericInterfaceInvokerEventFilter
(Contains additional functionalities to add conditions to events of invokers.)
Third Party Software
You need this third party software:
- XML::Simple
- XML::LibXML
- XML::LibXSLT
DynamicFields
- “GitLabIssueID” of type „TEXT“ to store the GitLab issue id (e.g.: 1)
- “GitLabProjectID” of type “TEXT” to specify the GitLab project, where the issue should be created (e.g.: 1)
- “GitLabCreateTime” of type “TEXT” to store the timestamp, when the issue was created
- “GitLabLastUpdate” of type “TEXT” to store the last update time of the issue in GitLab
- “GitLabIssueState” of type “TEXT” to store the latest state of the issue from GitLab
Configuring the GitLabConnector in OTRS
After you satisfied the pre-requirements, you’re ready to create a new web service within OTRS. The name of the new web service is “GitLabConnector”. Afterwards, you have to set up the needed invokers.
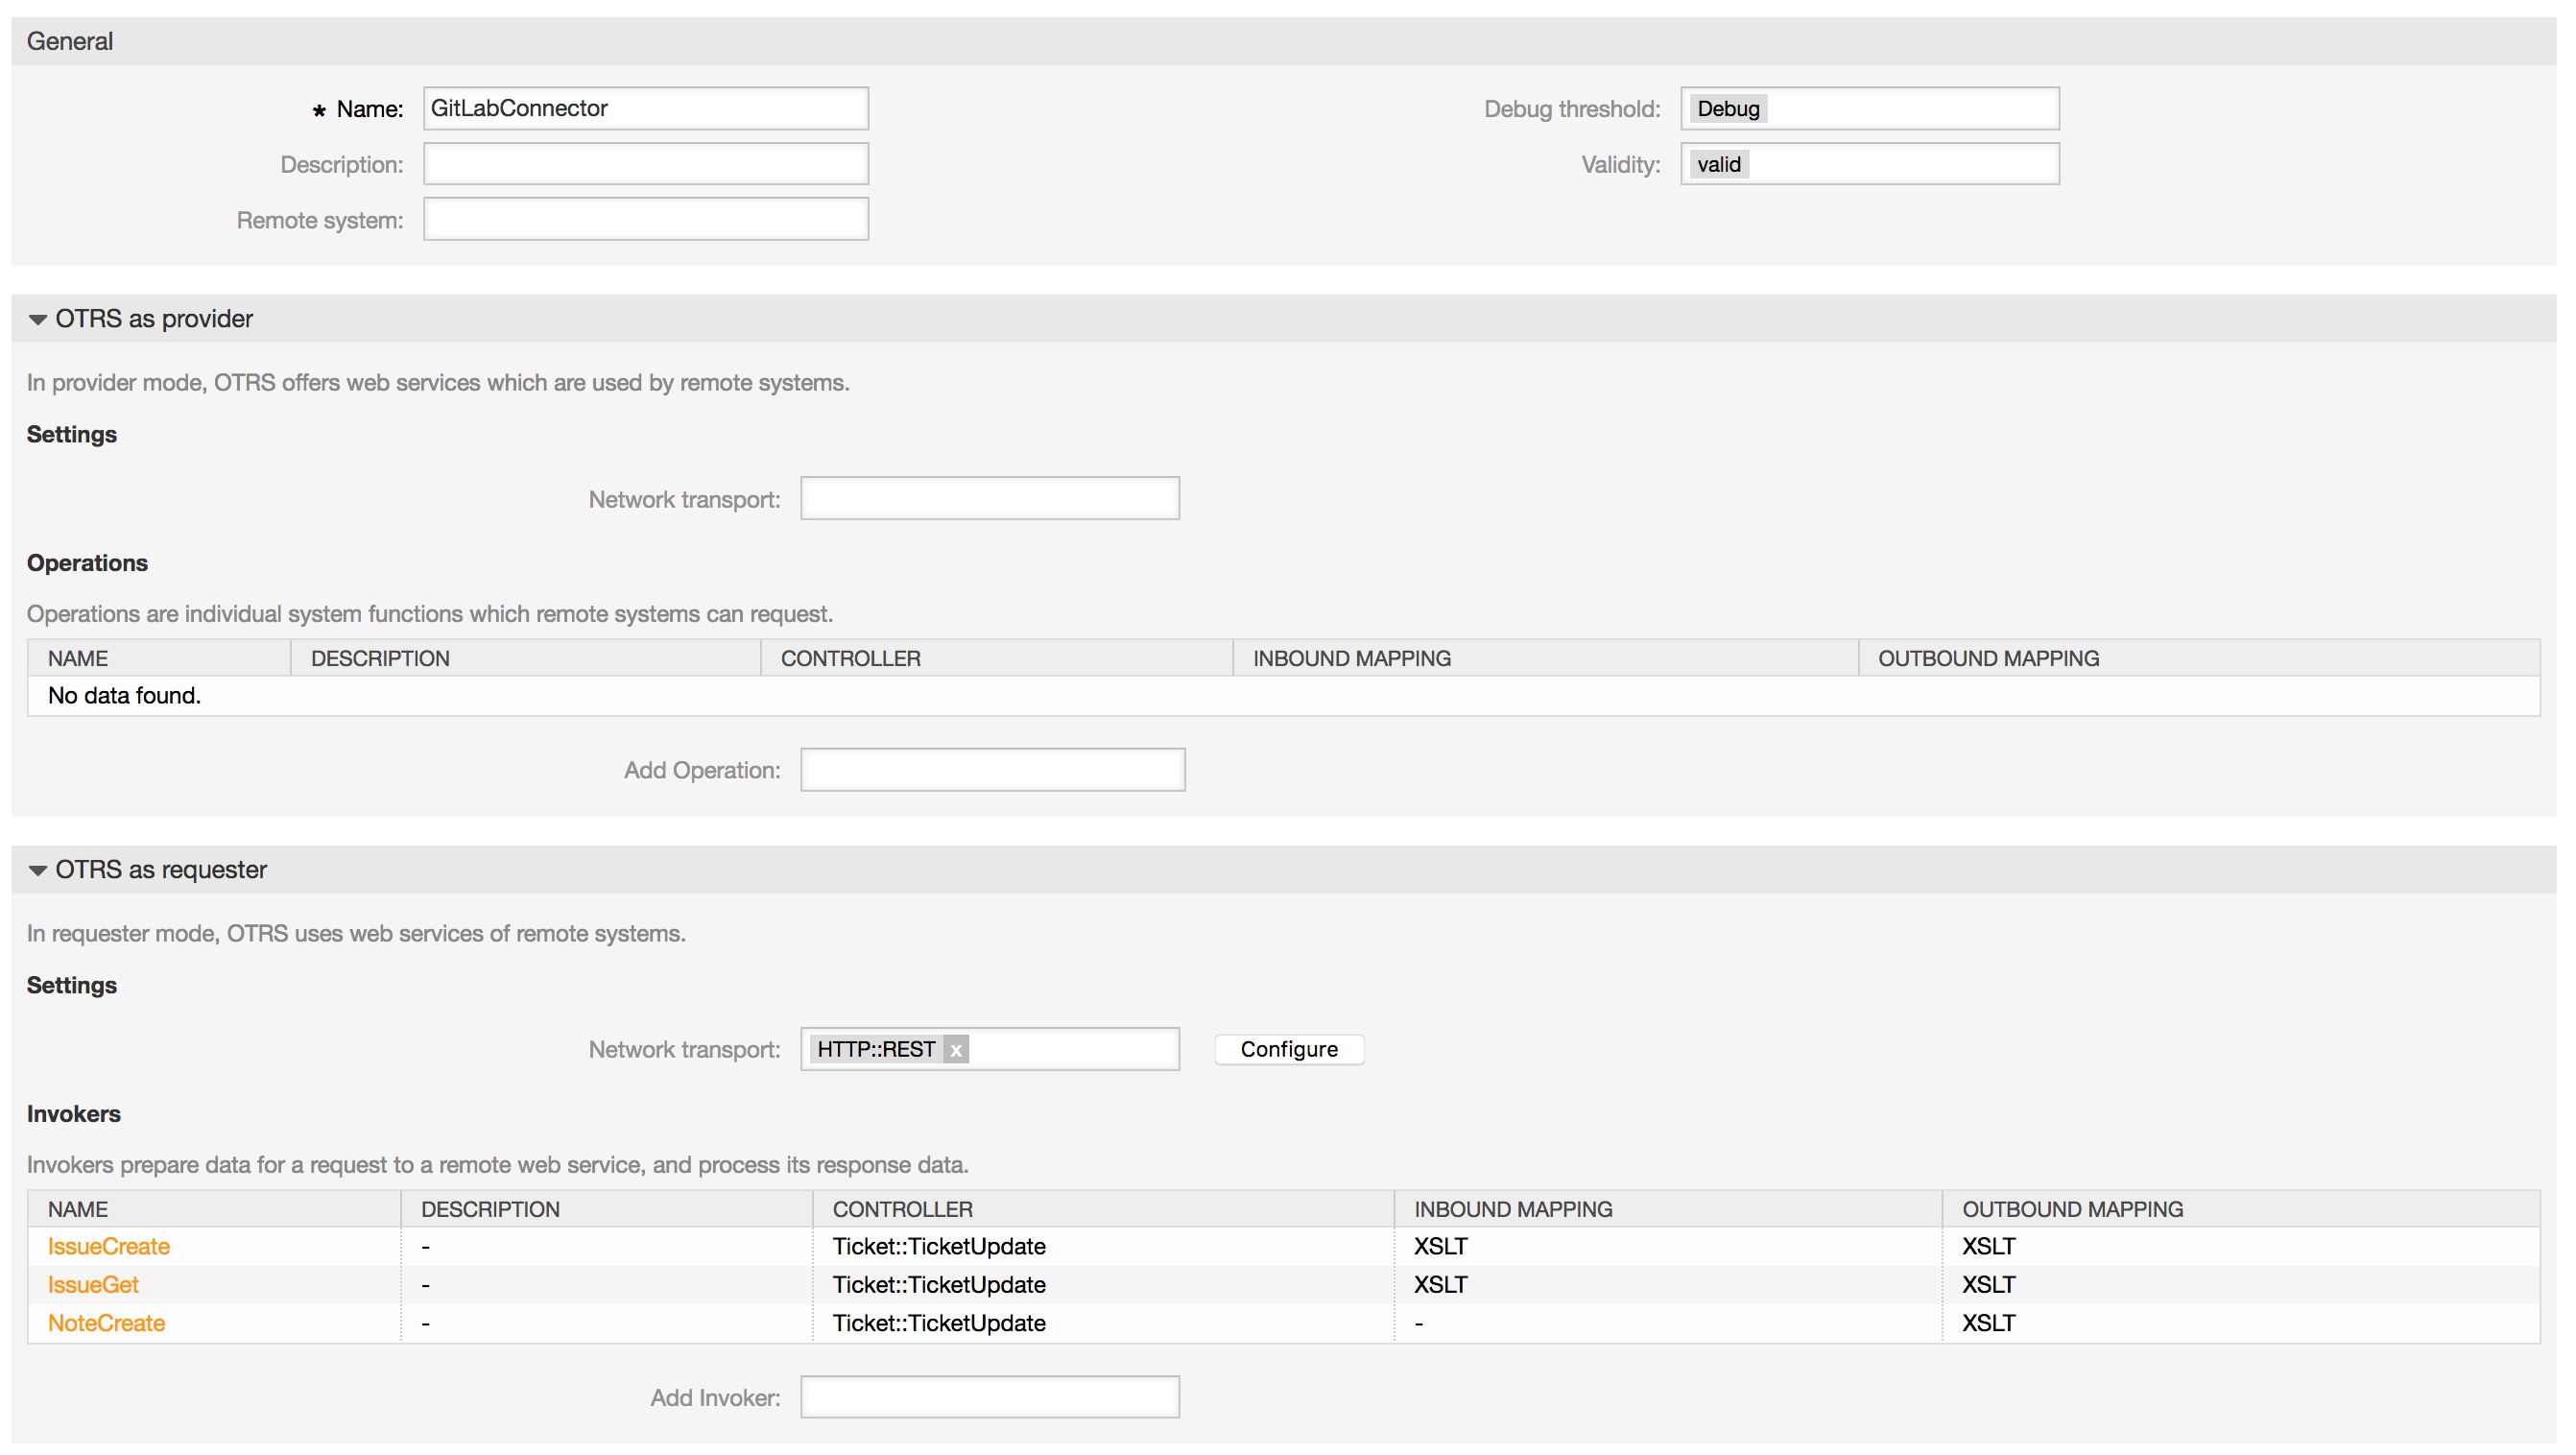
Configuring the Invoker “IssueCreate”
Now you’re ready to start the configuration of our Invokers. To be able to create issues in GitLab, you have to set up an Invoker called “IssueCreate”. Select all the needed data for your outgoing requests and use “XSLT” as mapping for your outgoing and incoming response data.
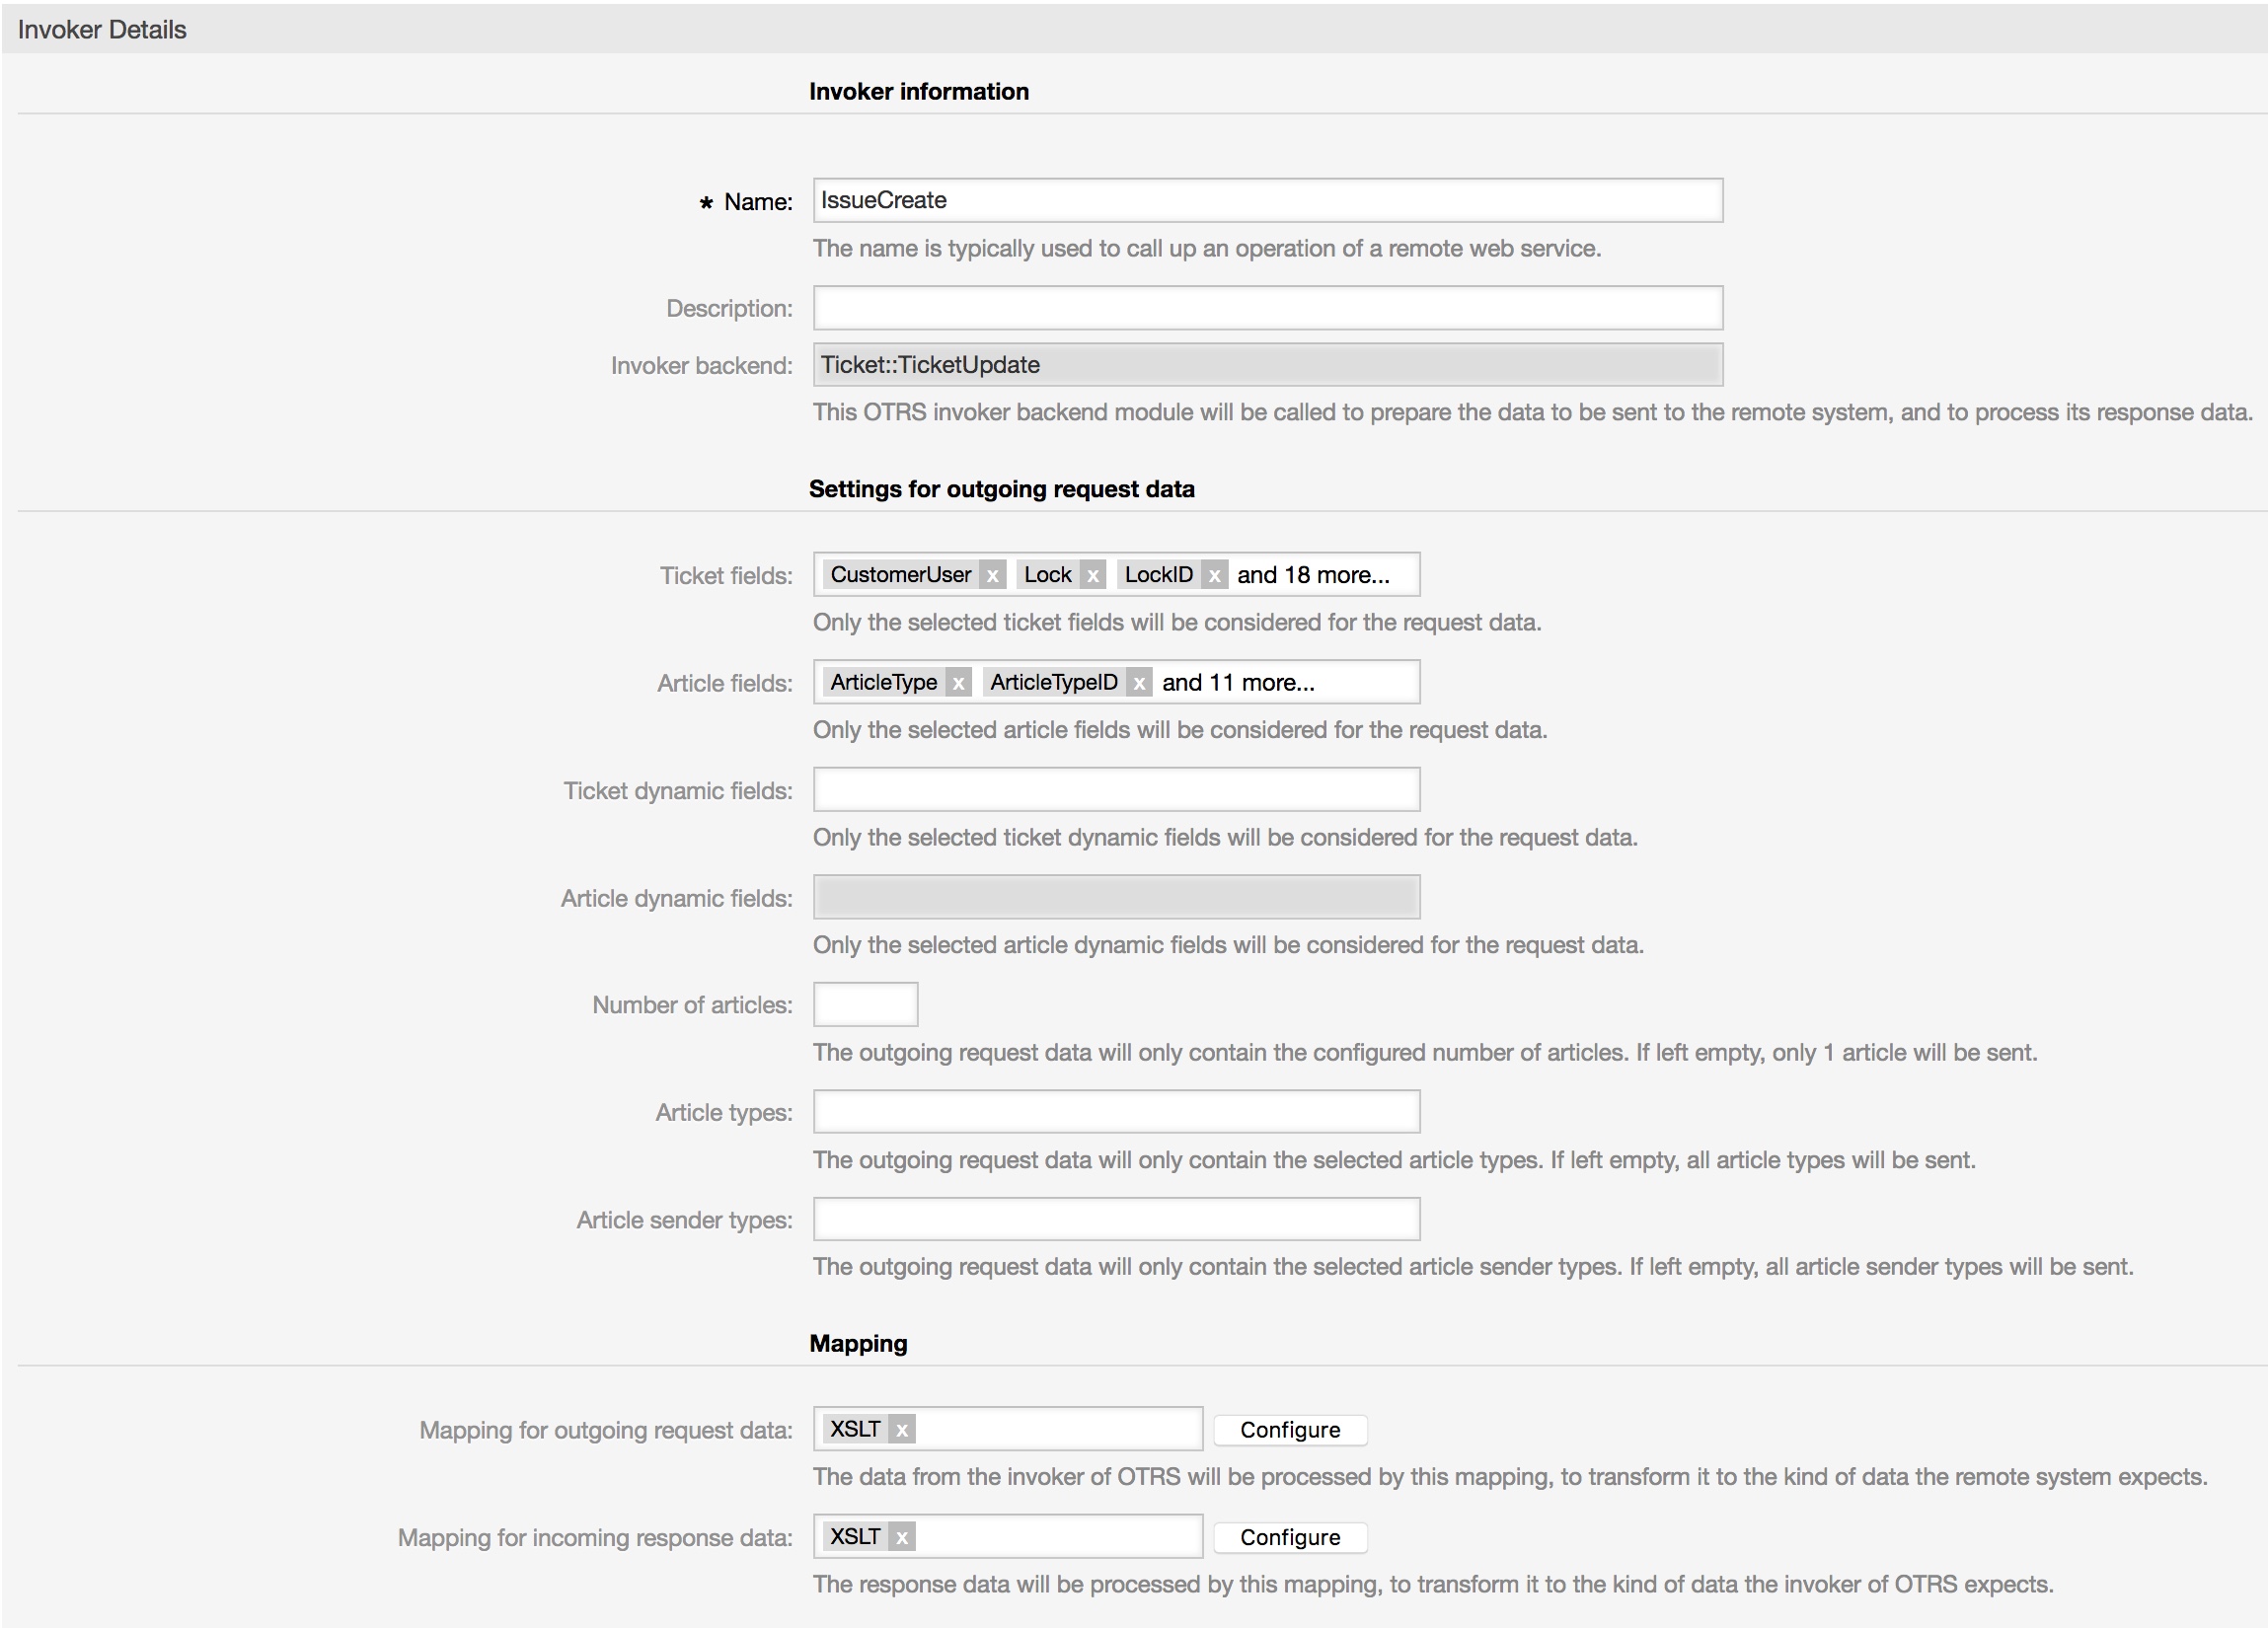

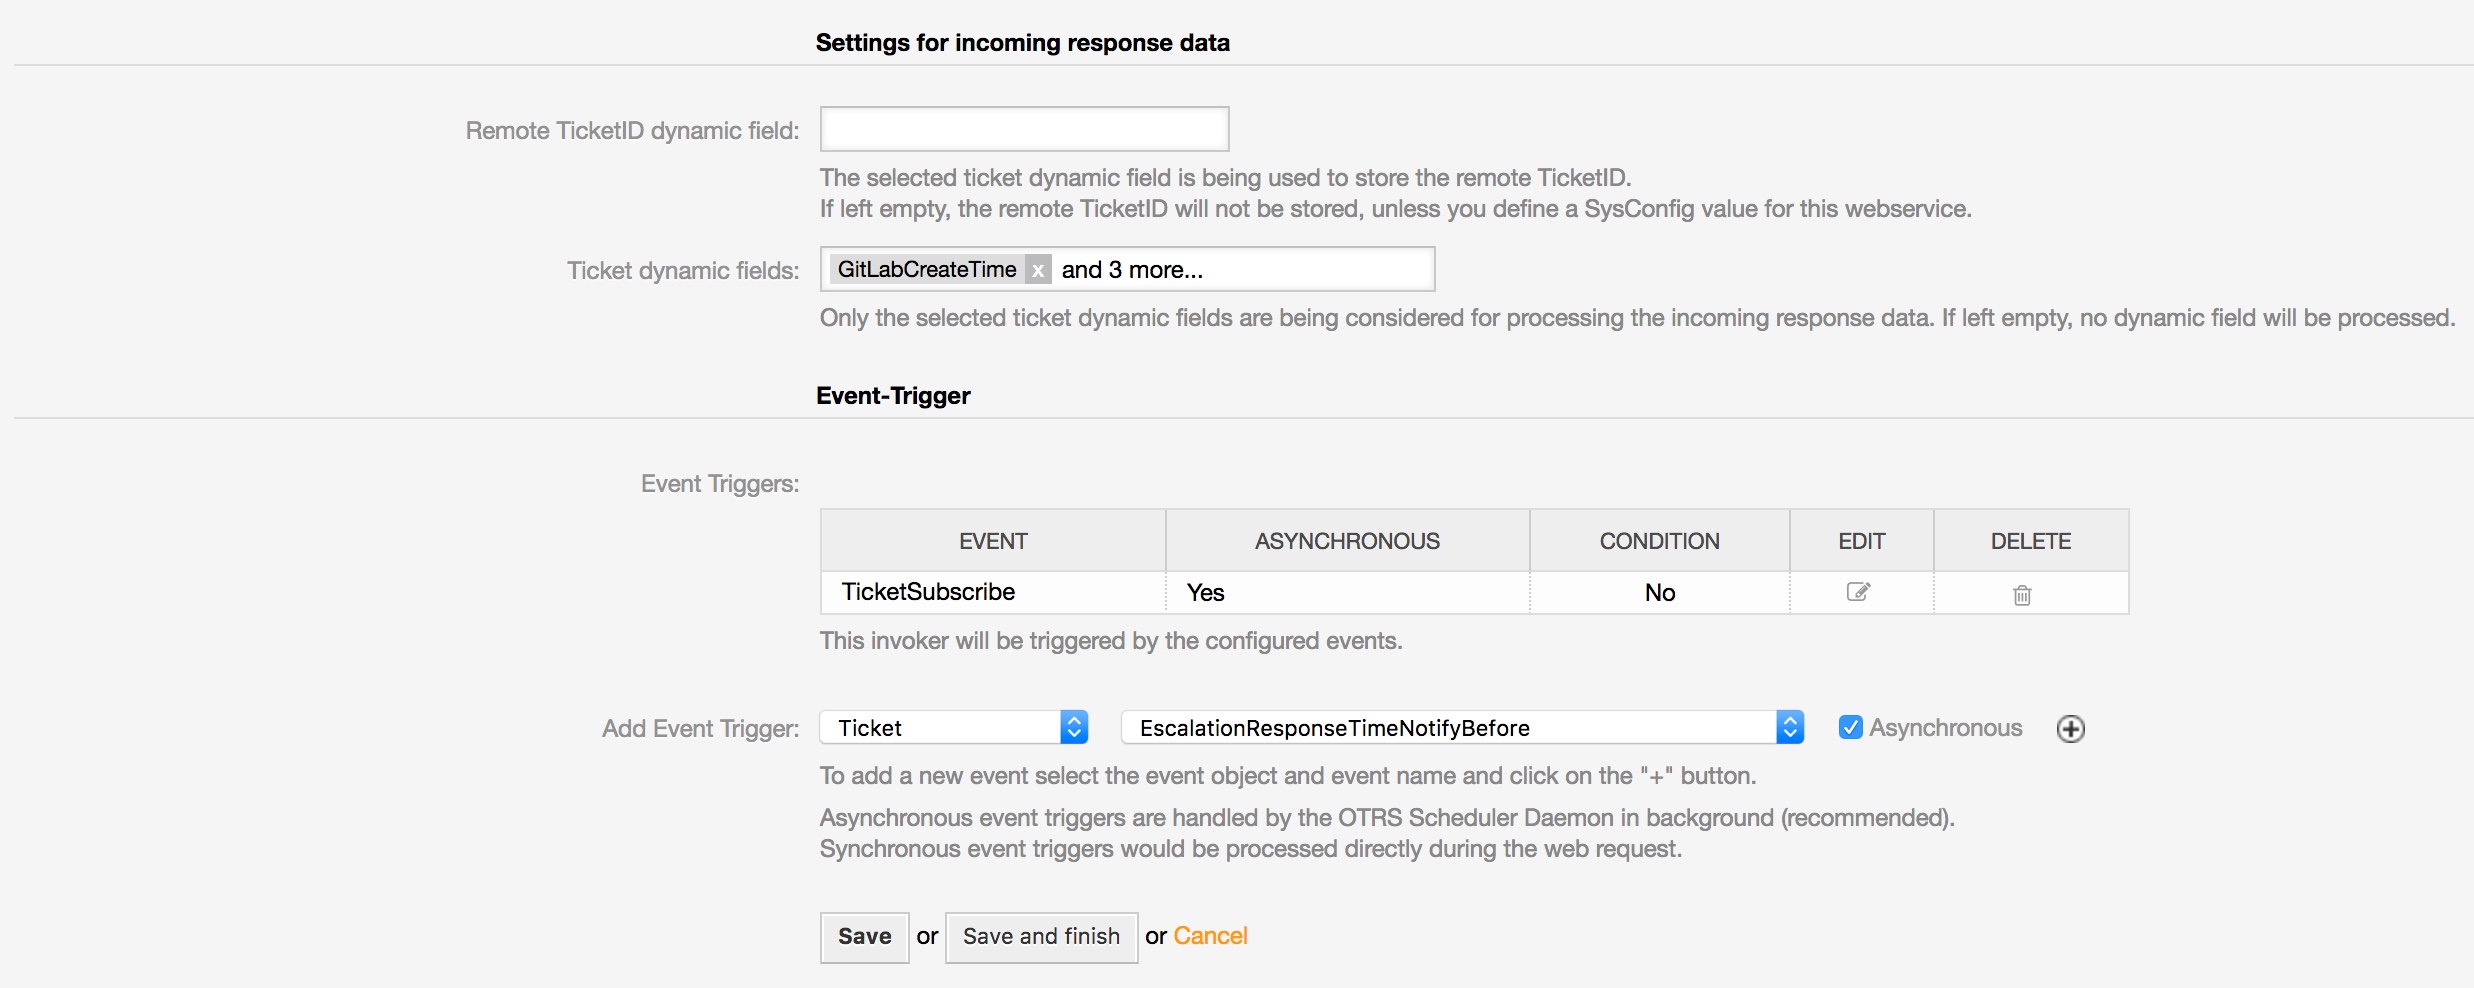
For the incoming response data, you have to select the dynamic fields (GitLabIssueID, GitLabCreateTime, GitLabLastUpdate and GitLabIssueState), which you created before.
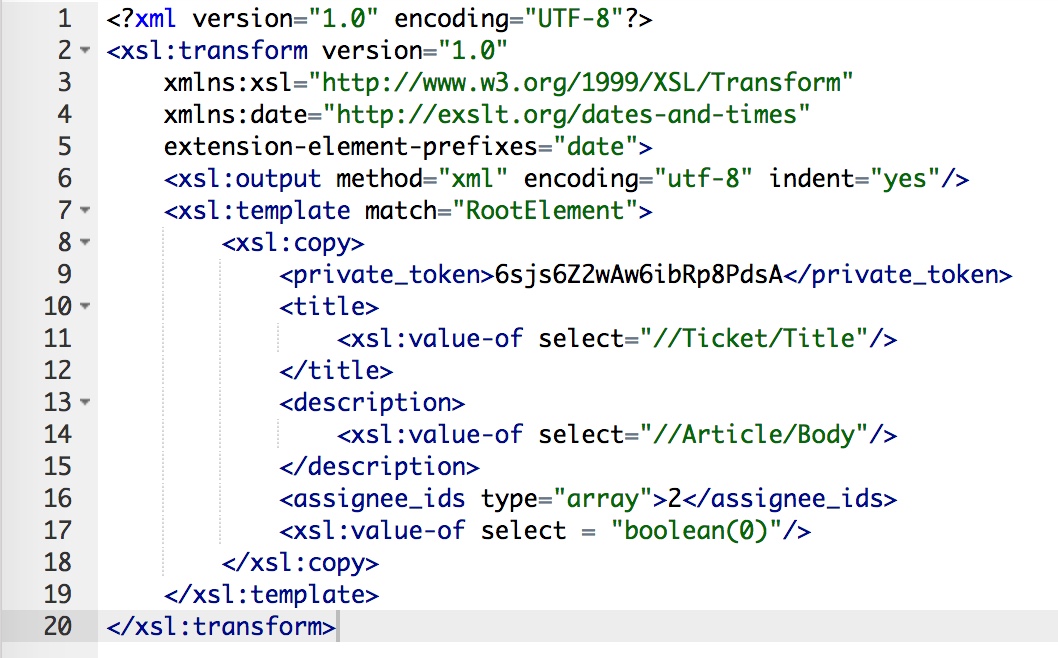
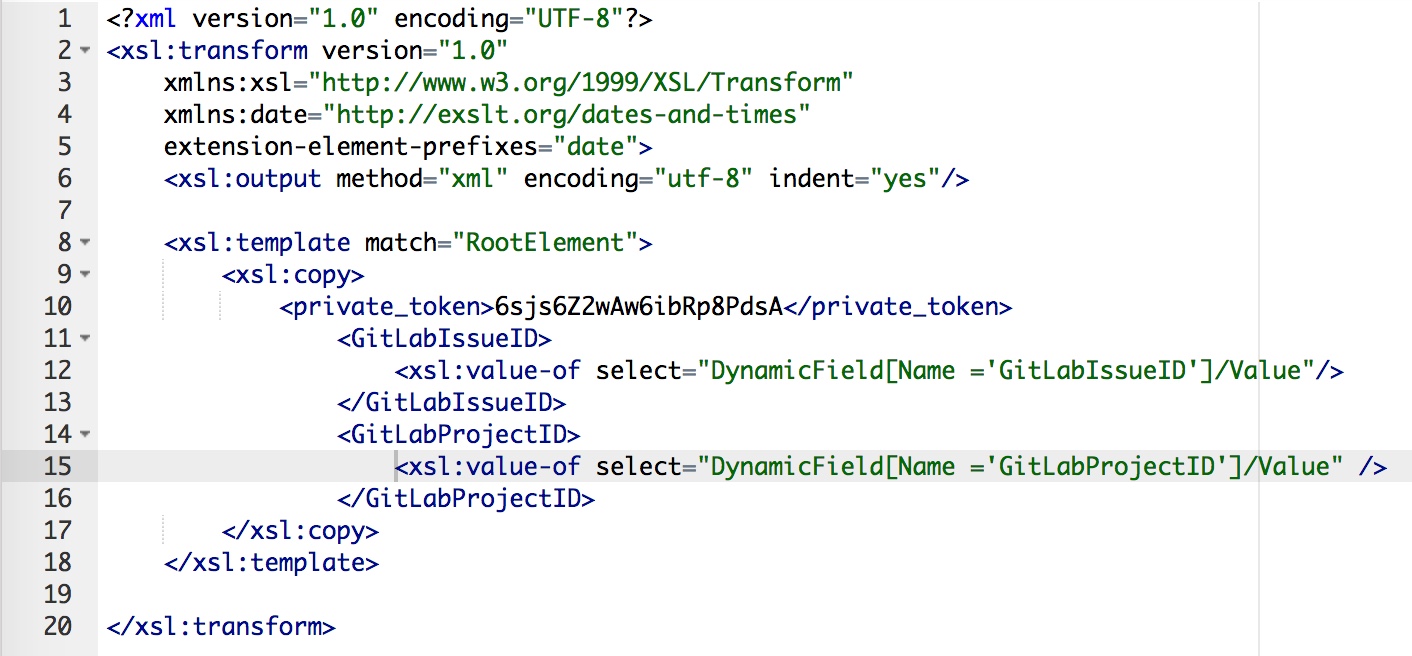
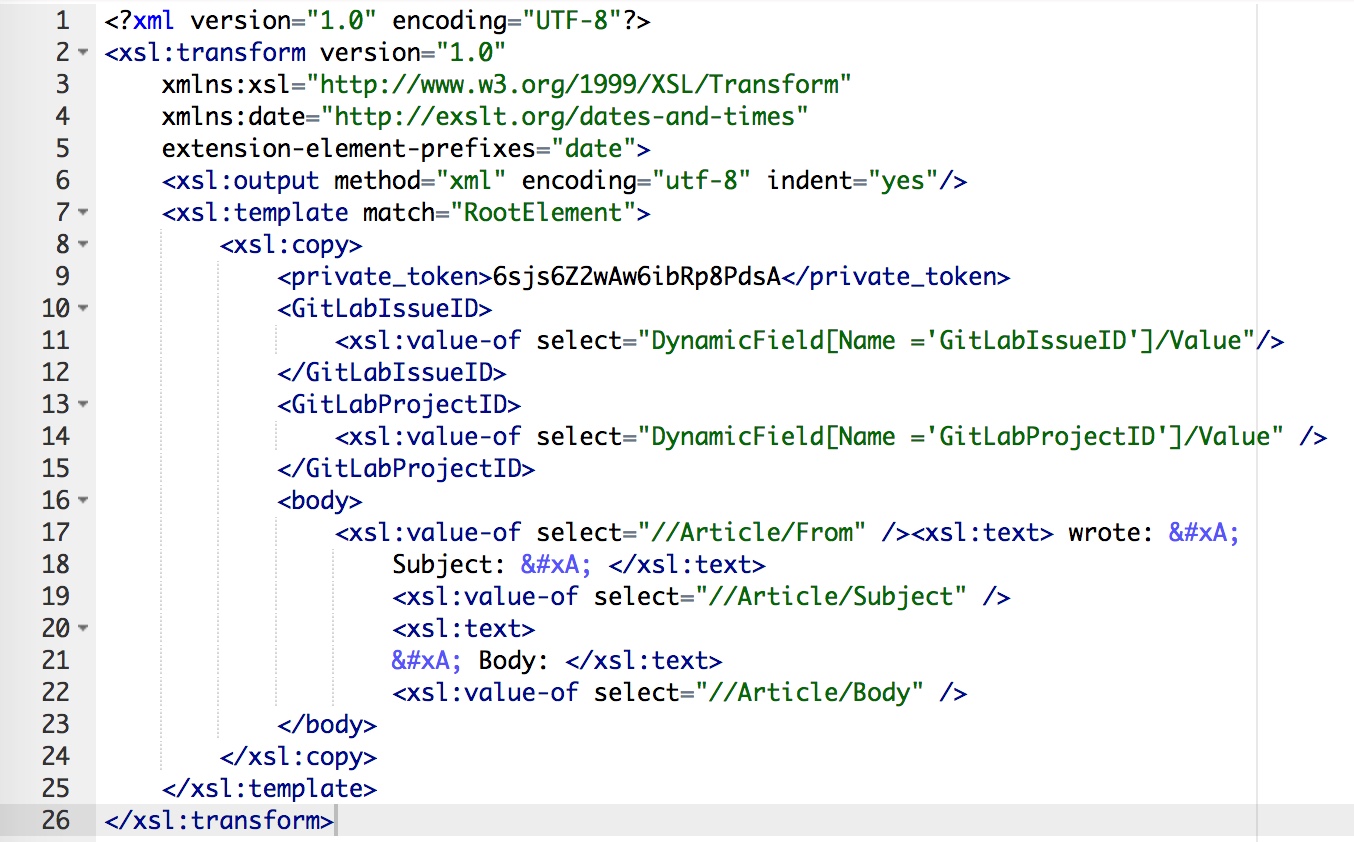
Now you can configure your outgoing XSLT-mapping. If you need a working XSLT-mapping, you can use the following example:
You also need a XSLT-mapping for the incoming response data, because you have to store the GitLab Issue ID, the Create Time the Last Update Time and the GitLab Issue State:
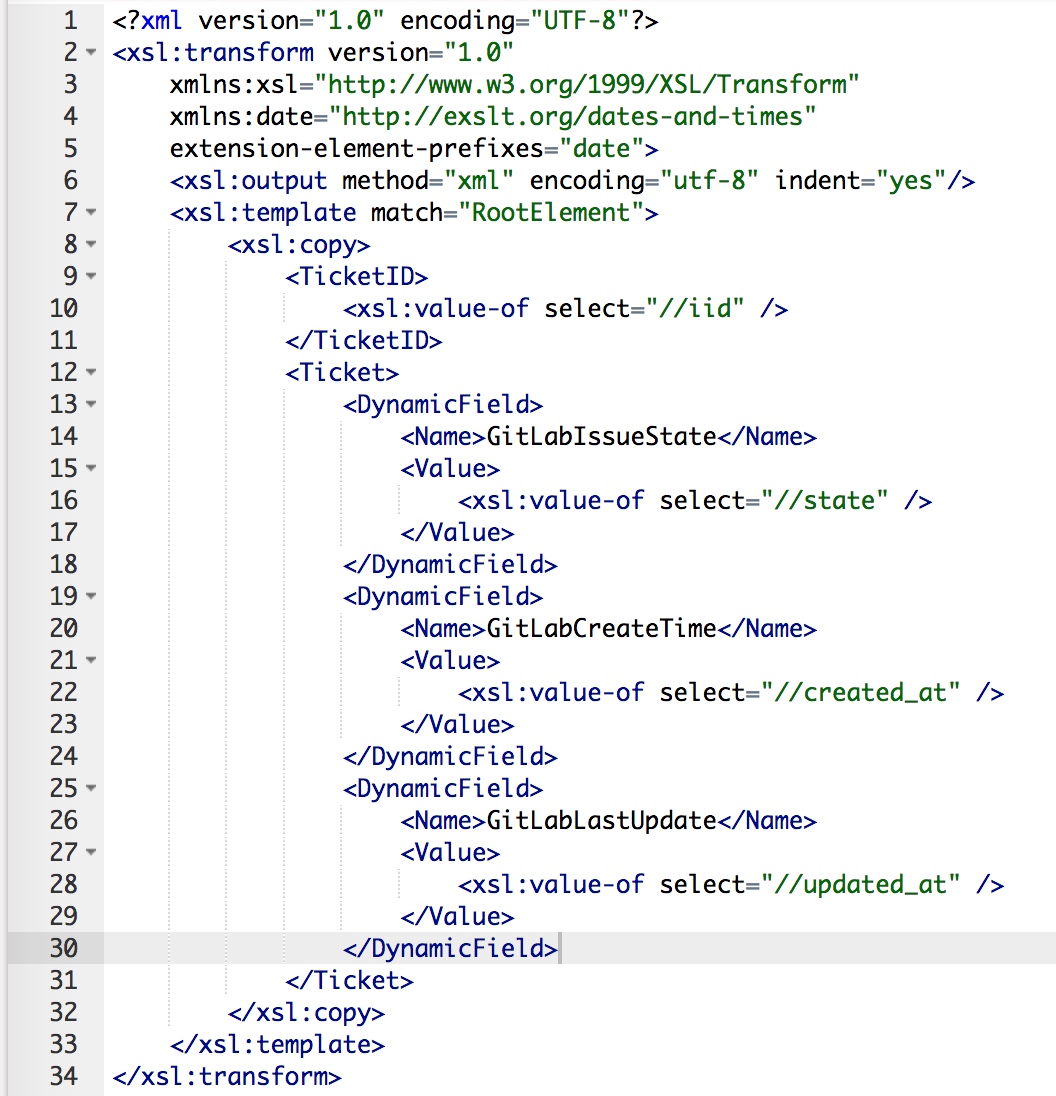
OTRS stores the GitLab Issue ID in the dynamic field “GitLabIssueID”. Afterward, it’s shown in the OTRS TicketZoom.
Furthermore, we want to know the latest State of the GitLab Issue, that’s the reason why it’s also stored in a dynamic field
The used “Event trigger” is the last point for this invoker. Just select one and you’re done with the first Invoker.
Configuring the Invoker “IssueGet”
The next invoker is “IssueGet”. Select all the needed data for your outgoing requests (please don’t forget the dynamic field “GitLabIssueID” in the “Ticket dynamic fields” dropdown) and use “XSLT” as a mapping for your outgoing data.

As outgoing XSLT-mapping, you can use my example. I will transmit the Issue ID to GitLab because I want to get the latest Issue state.
A mapping for the incoming response data is necessary because we want to store the “LastUpdate” timestamp and the latest Issue state.

The used “Event Trigger” is the last point for this Invoker. Just select one and you’re done with the second Invoker. In my example, I’m using a dynamic field update, which is automatically set by a GenericAgent.
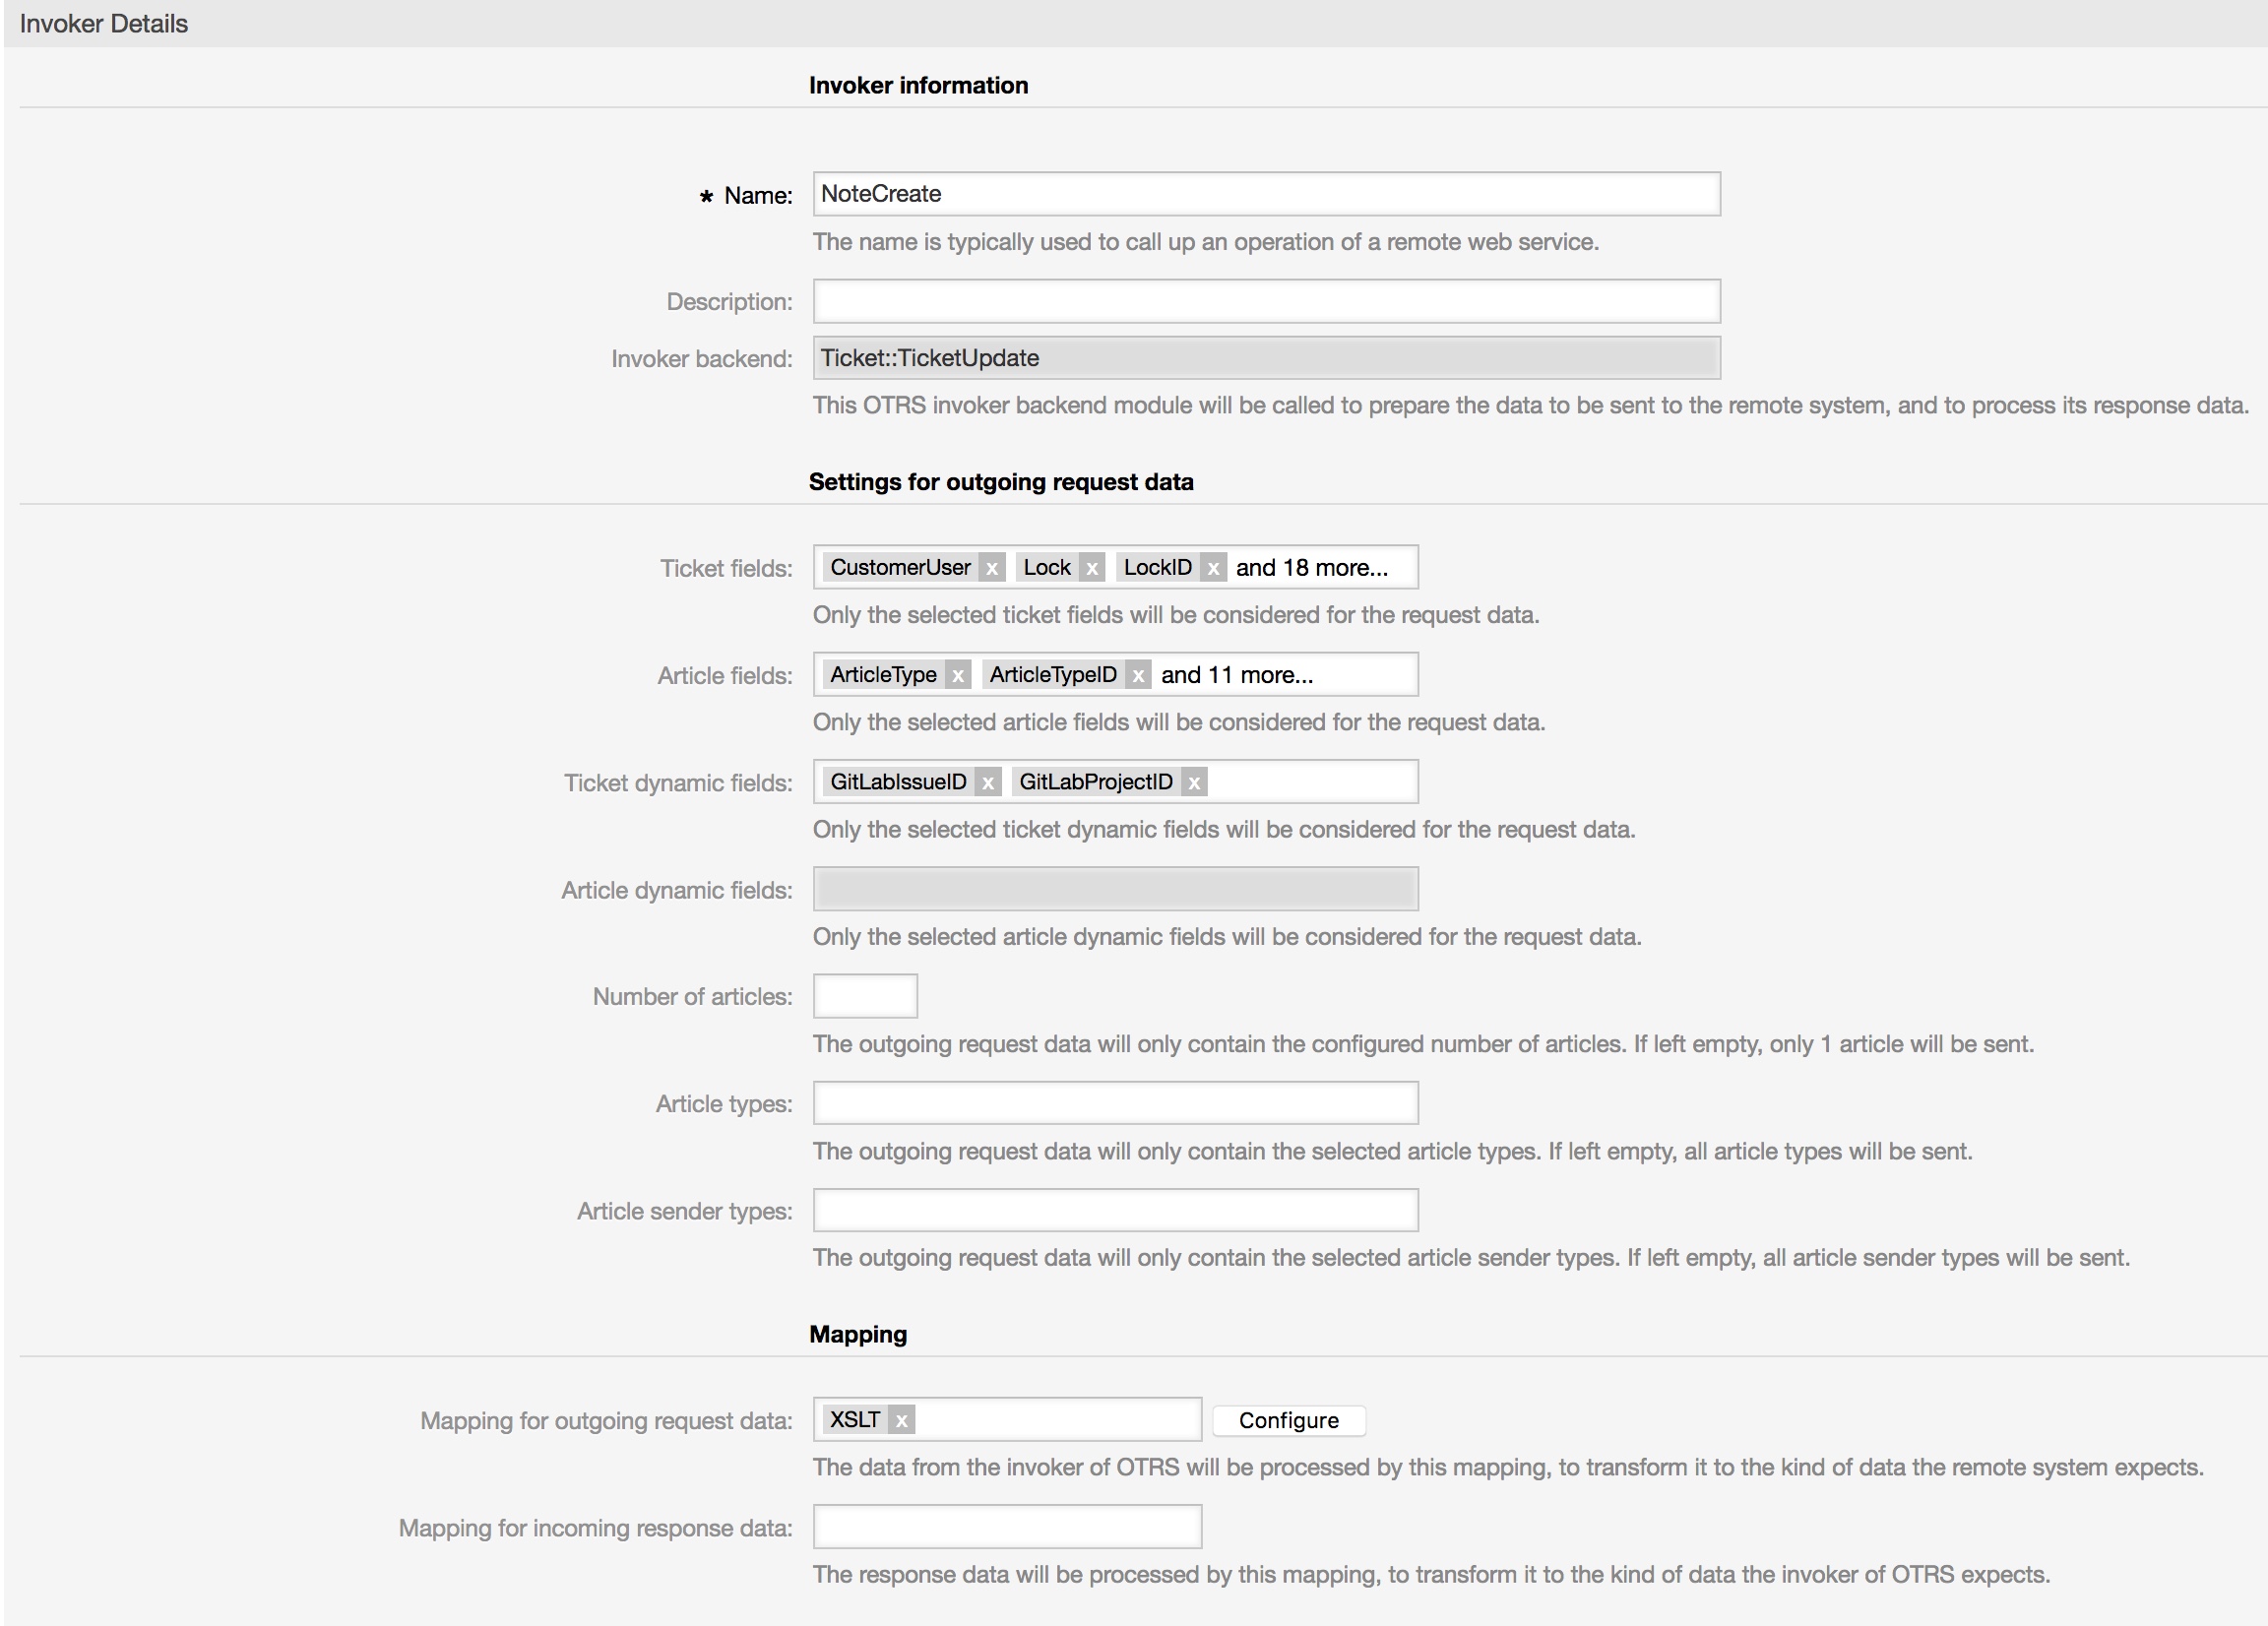
Configuring the Invoker “NoteCreate”
The next invoker is “NoteCreate”. Select all the needed data for your outgoing requests (please don’t forget the dynamic field “GitLabIssueID” in the “Ticket dynamic fields” dropdown) and use “XSLT” as a mapping for your outgoing data.
Use my example as outgoing XSLT-mapping:
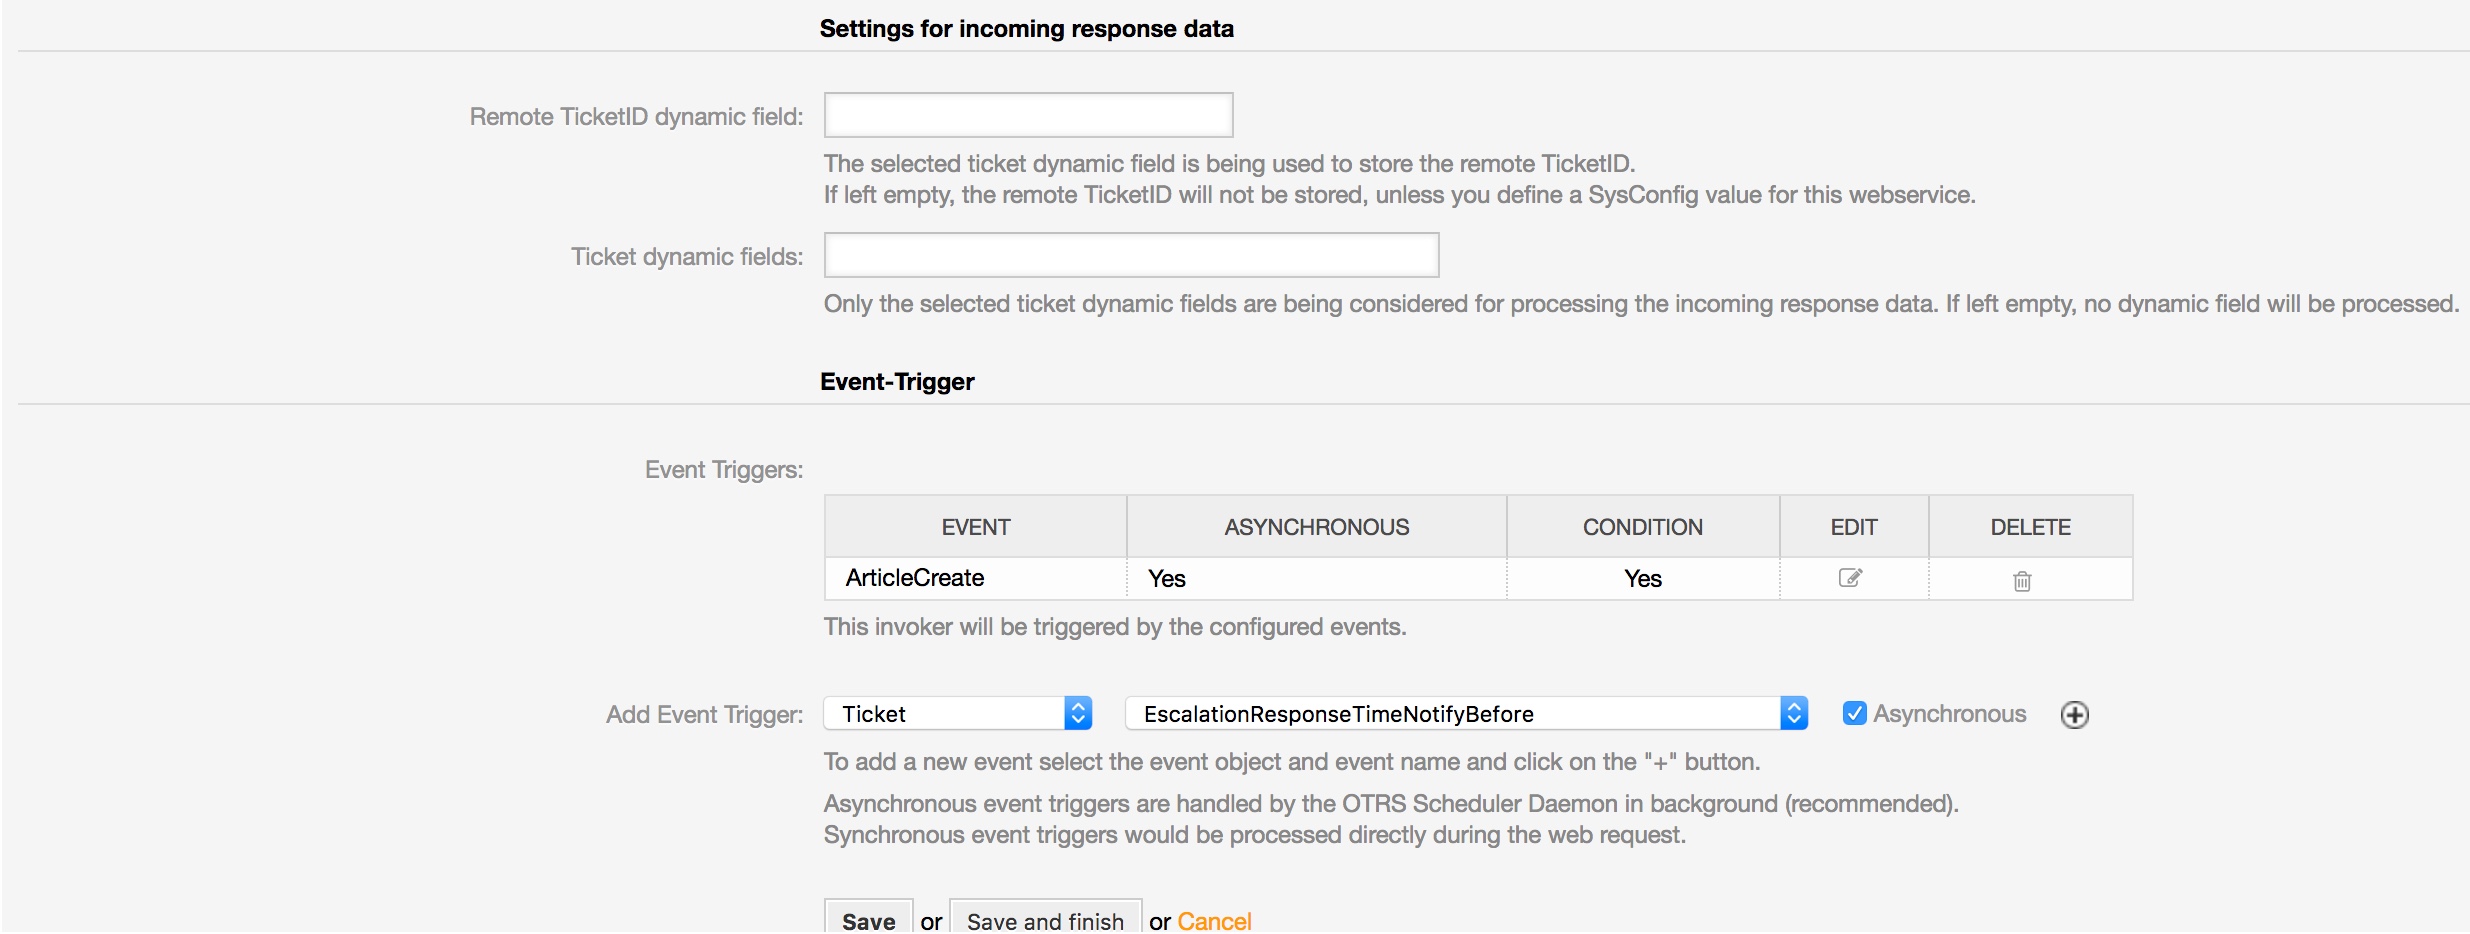
You don’t need a mapping for the incoming response data.
The used “Event trigger” is the last point. Select one and you’re done with the last Invoker of my tutorial. In my example I’m using an ArticleCreate event in OTRS, to trigger the Invoker.
Configuring the GitLabConnector “Network Transport”
Requester configuration
It’s necessary to configure the network transport for the Invokers because we’ve to use the right requests commands towards GitLab.Otherwise, we’ll receive errors. It’s quite easy as you can see:
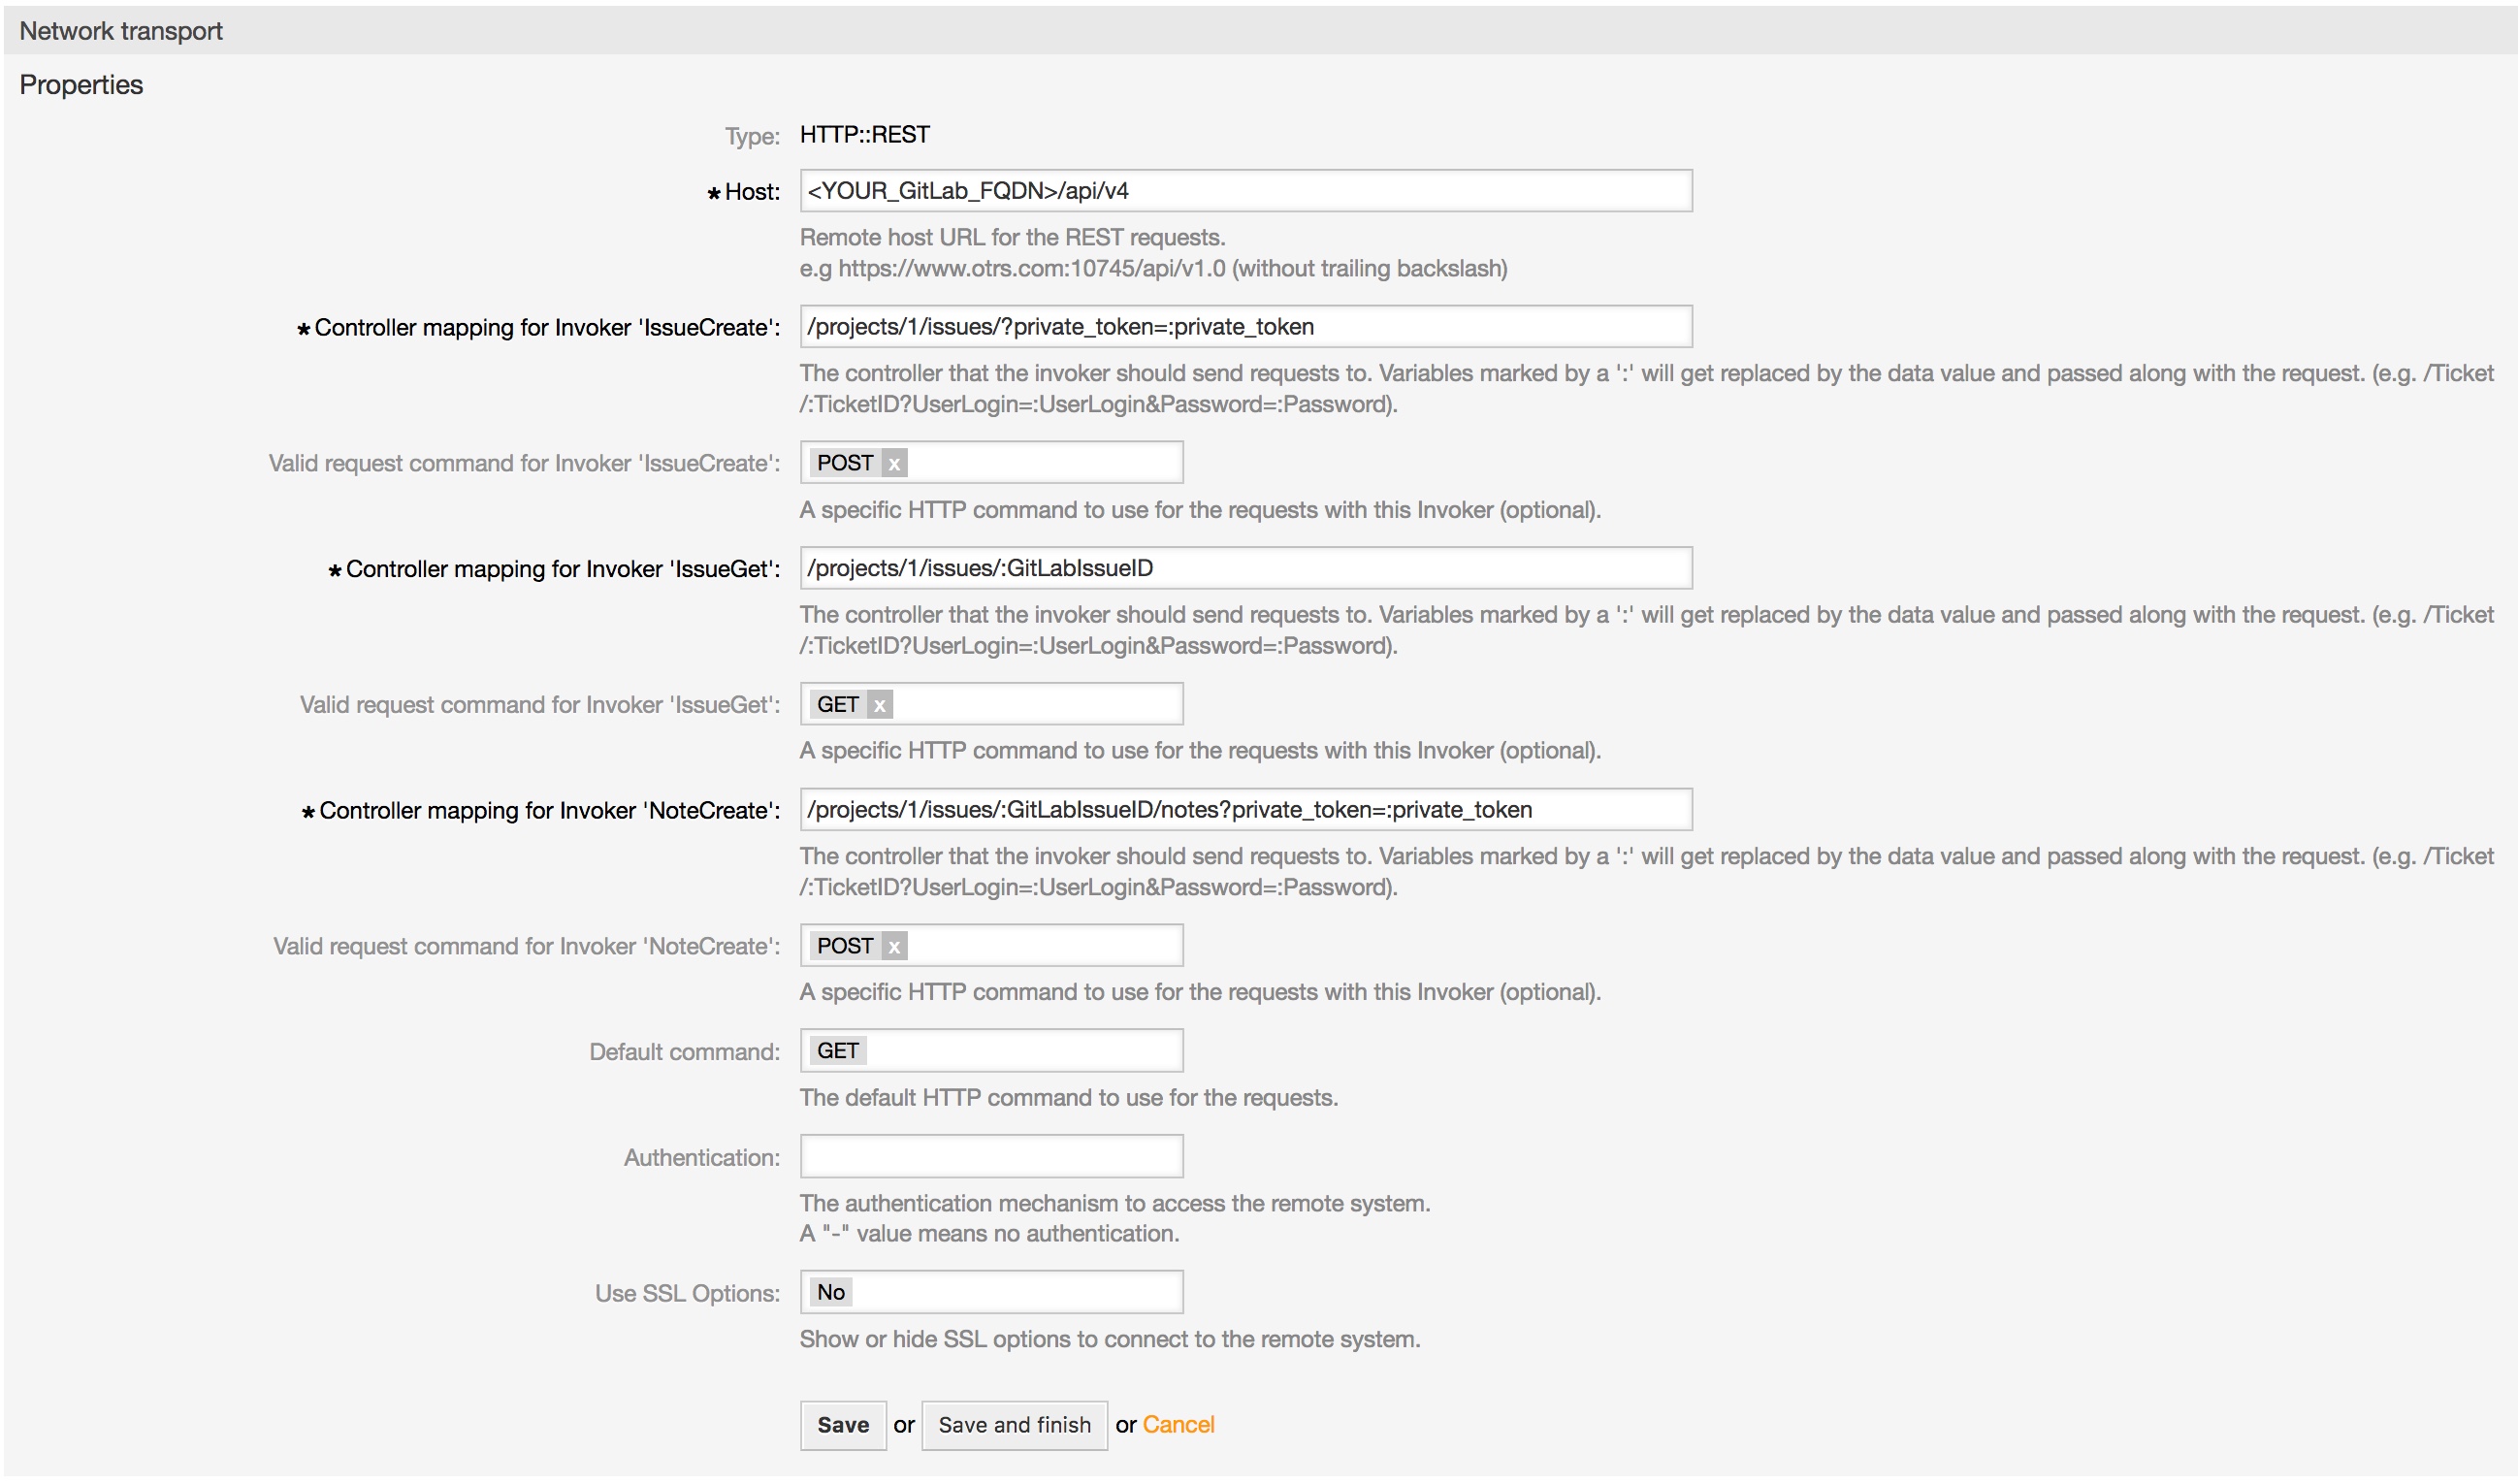
We don’t have to use an authentication module because we’re using the private token of a specific user in our mapping.
Afterward just click on “Save and finish”.
Testing the GitLabConnector
Testing the Requester
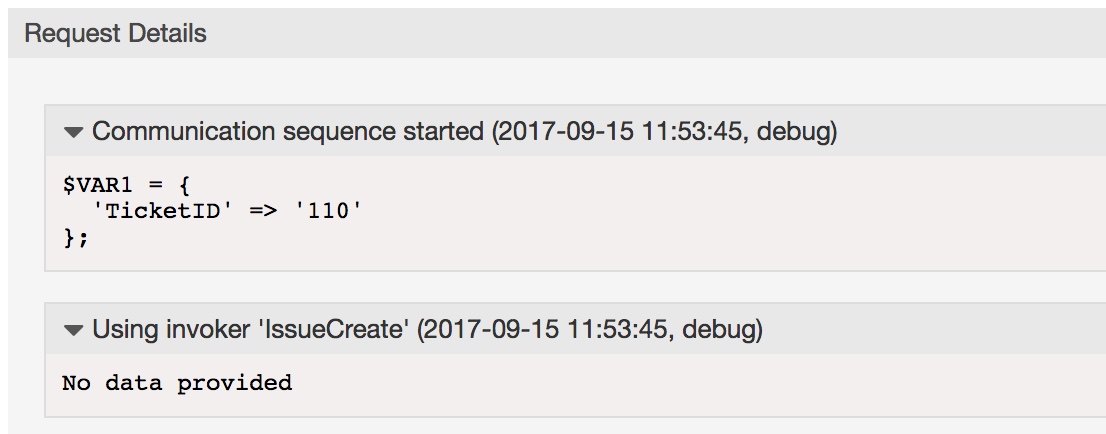
Create or take an already existing ticket and trigger the “IssueCreate” Invoker.
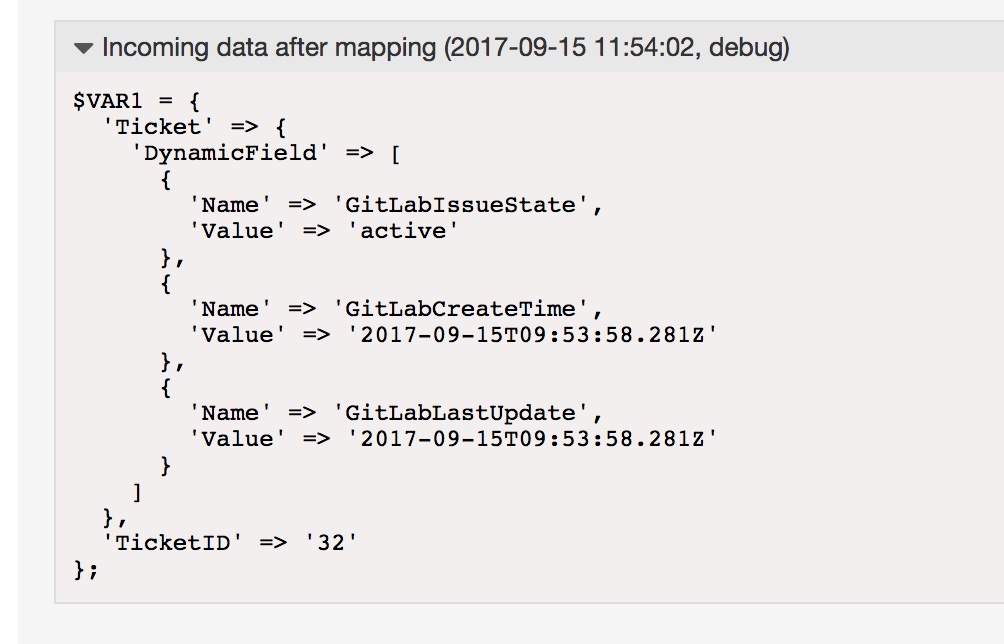
As result you should see something similar in the OTRS Debugger:
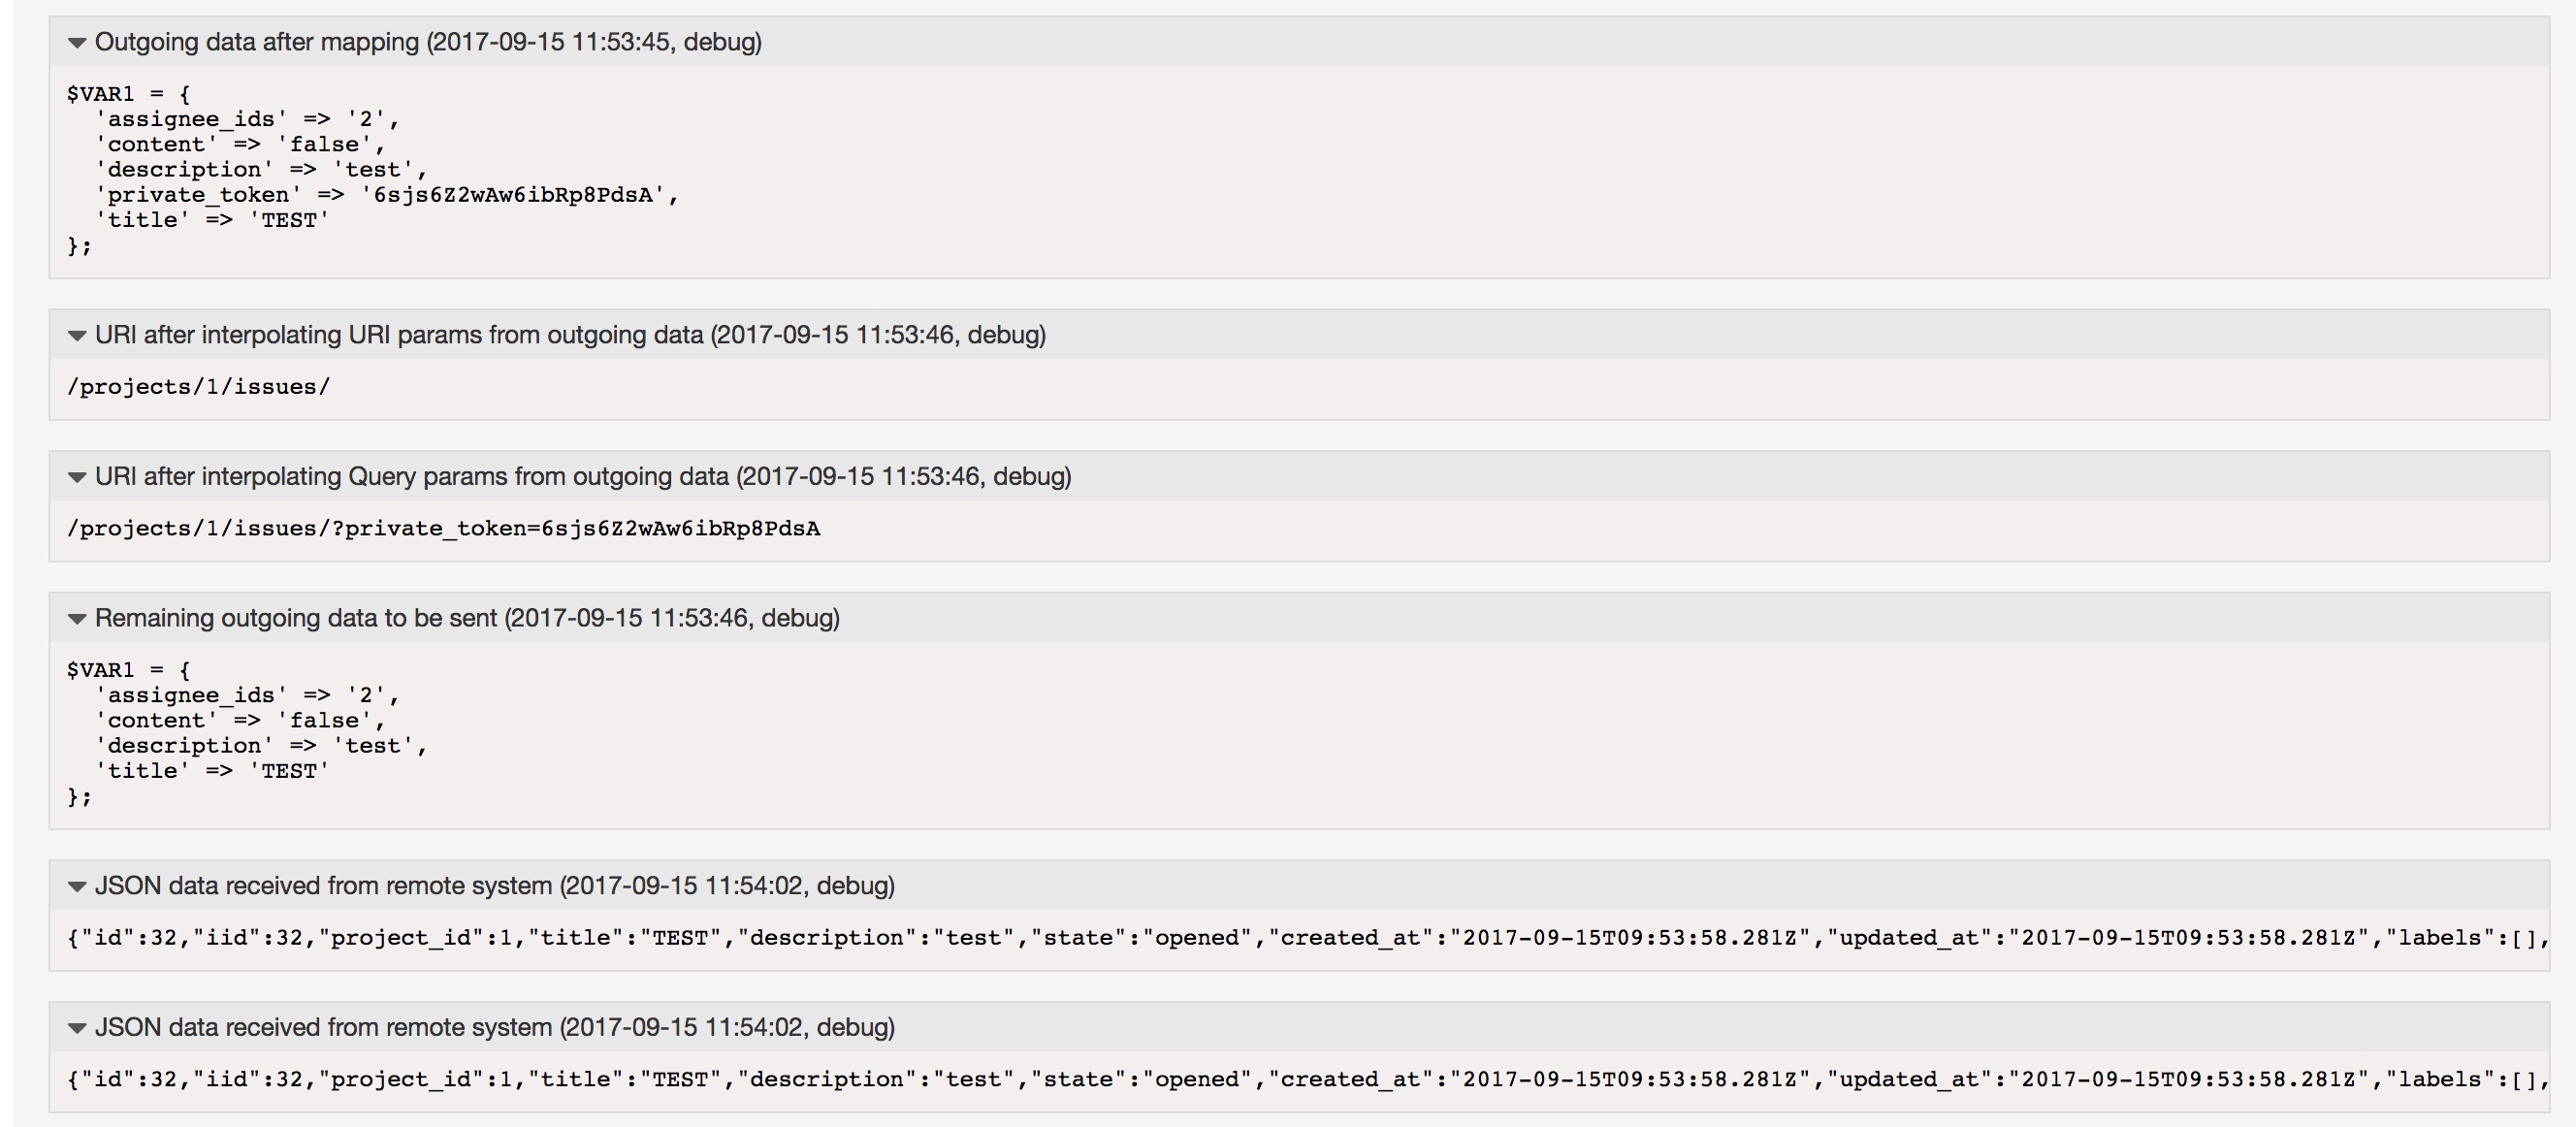
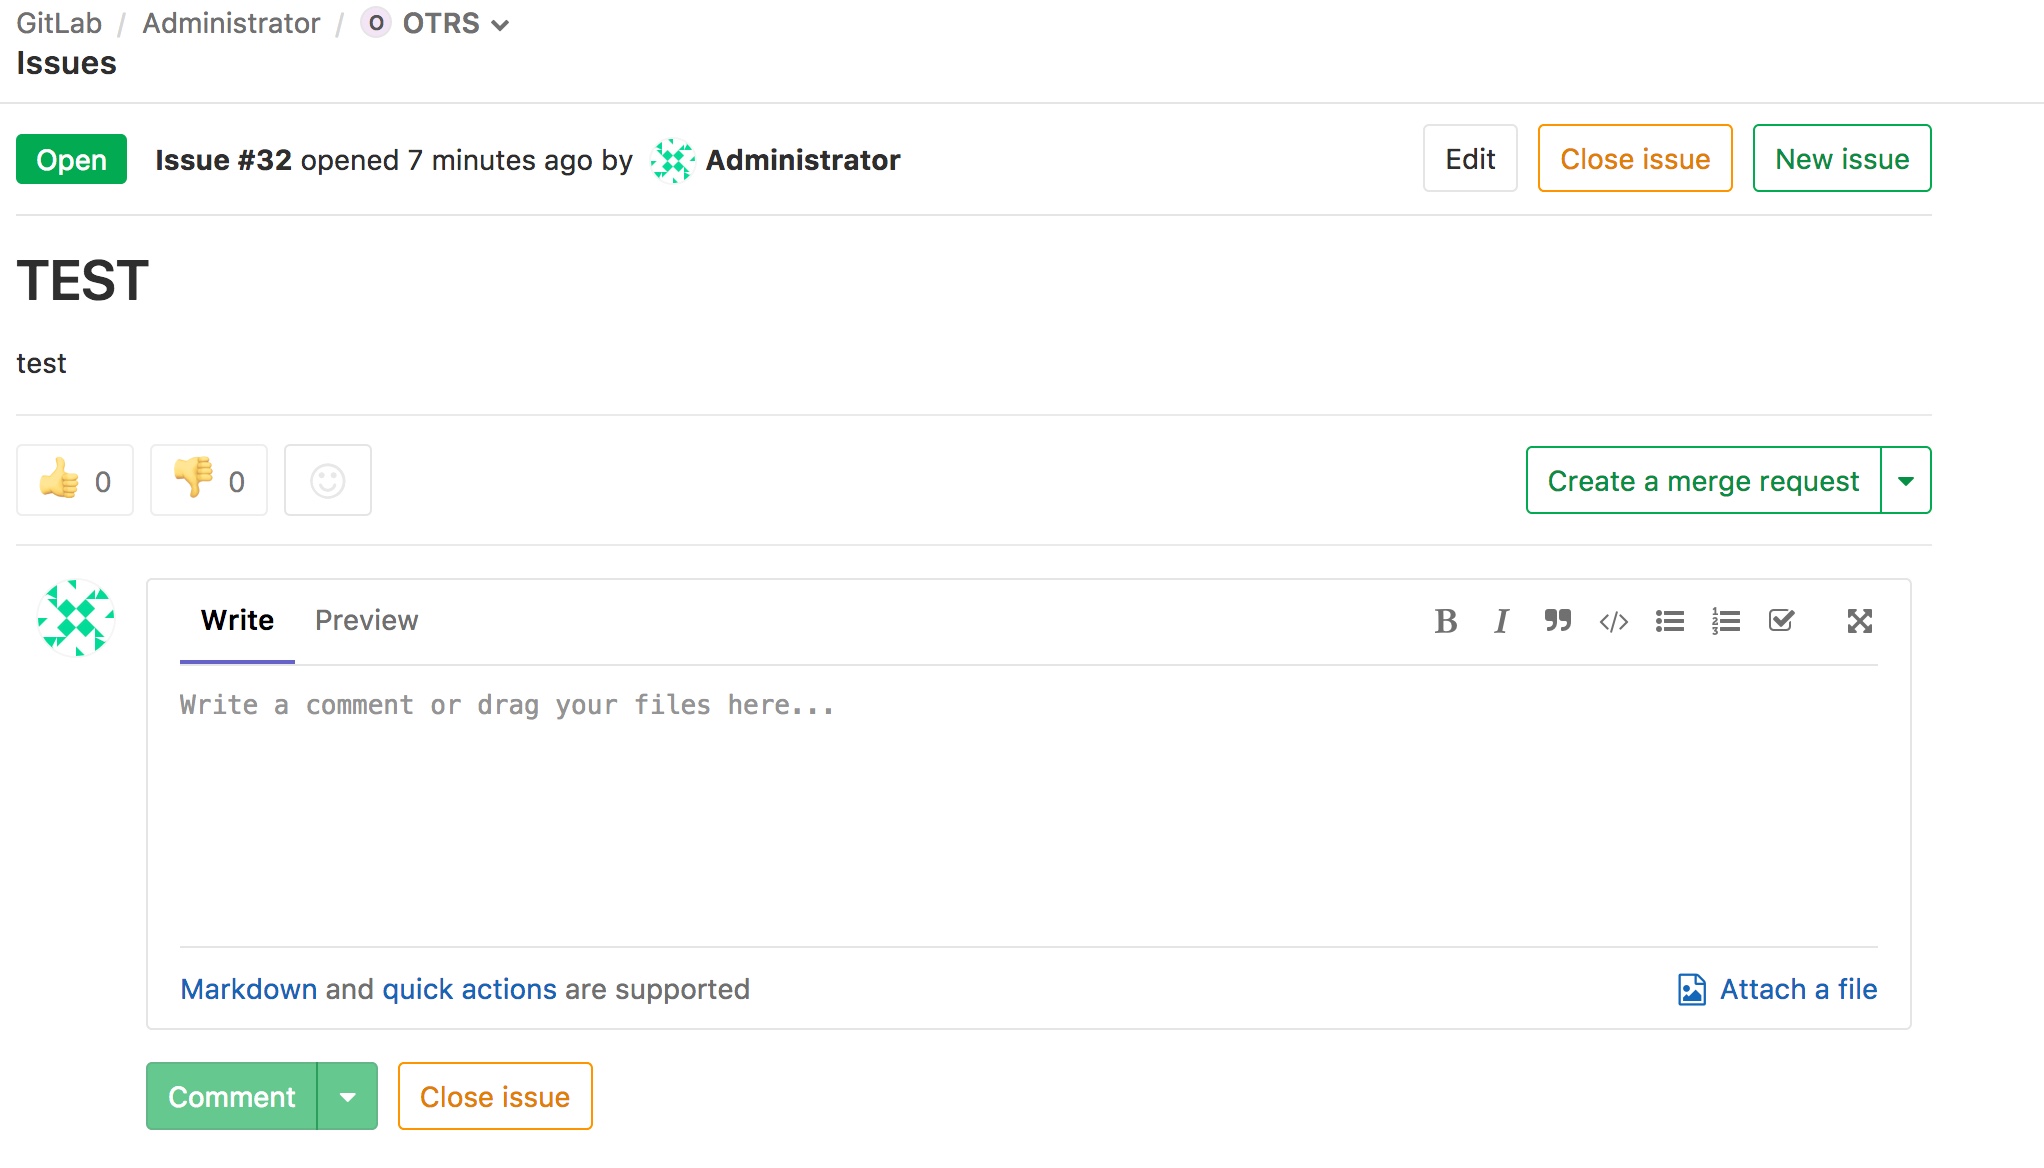
In GitLab a new issue was created:
If we now trigger the Invoker “IssueGet” we’ll see the following in the Debugger:
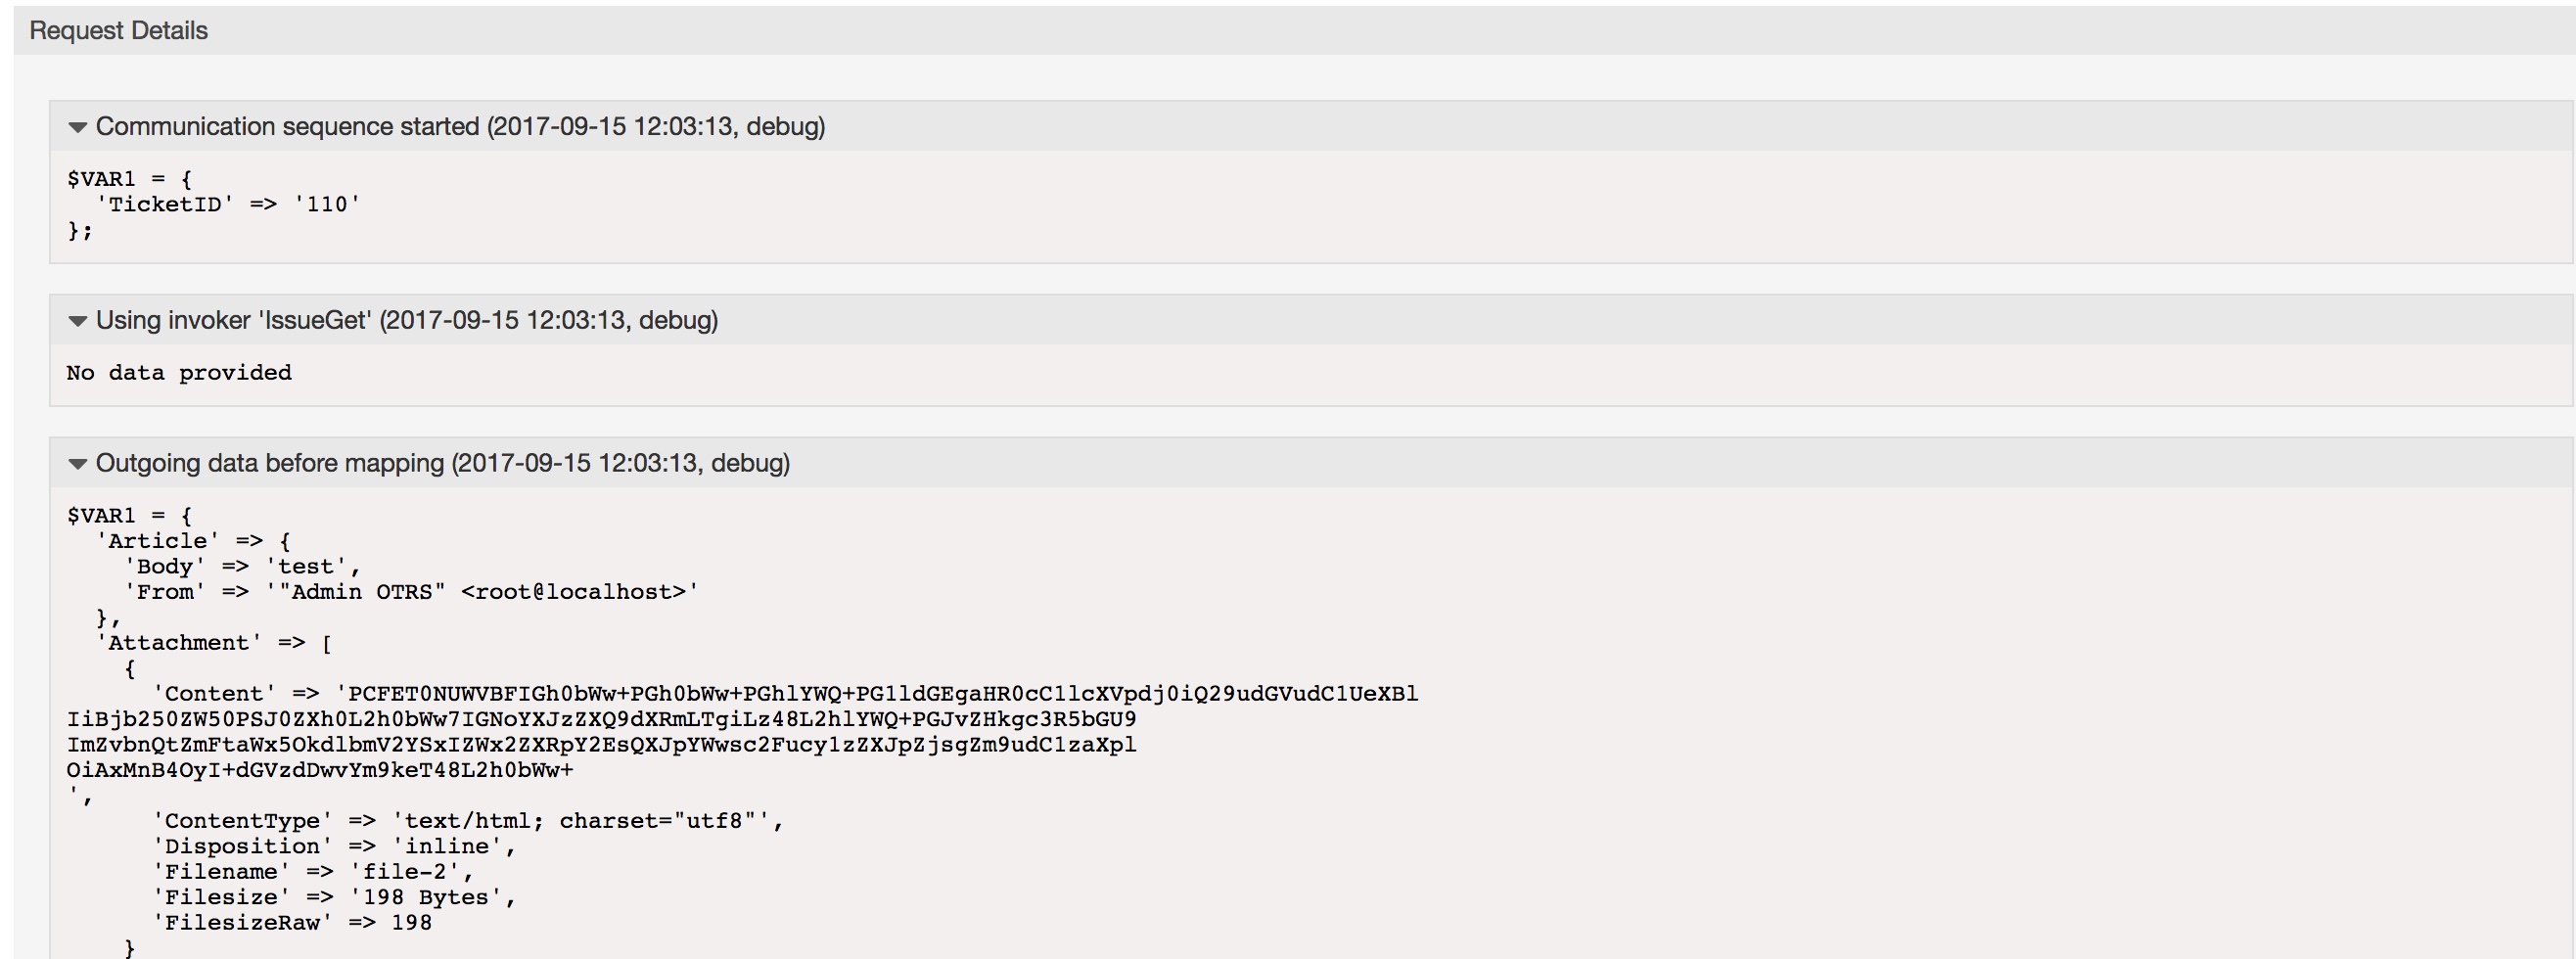

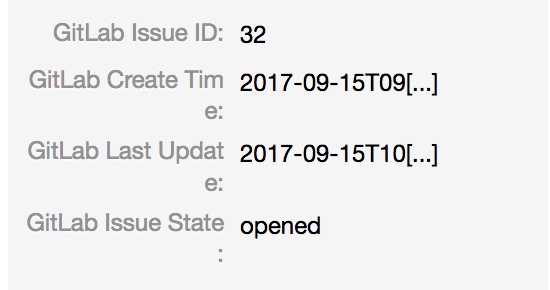
OTRS is now requesting everything from GitLab for a specific issue and is mapping the data into our dynamic fields:
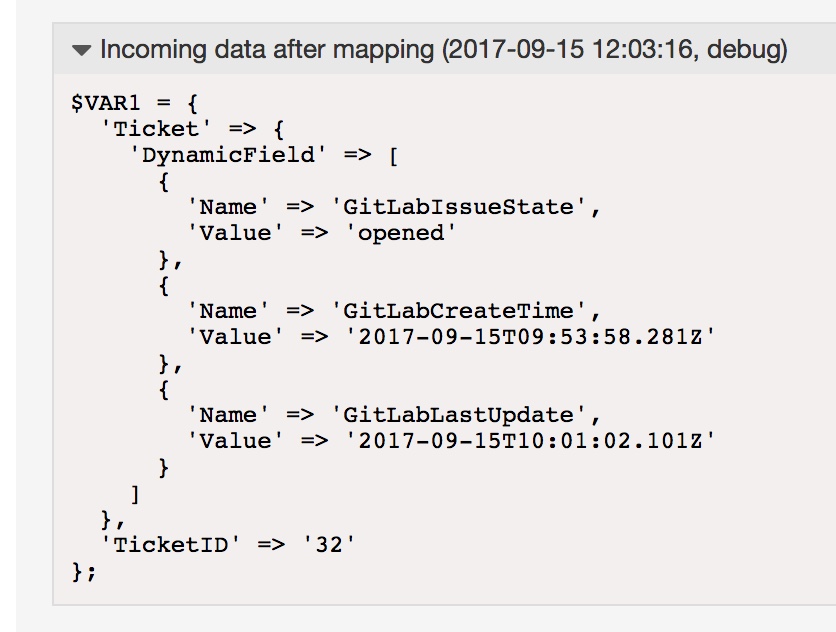
You’ll now see the following information in the TicketZoom:
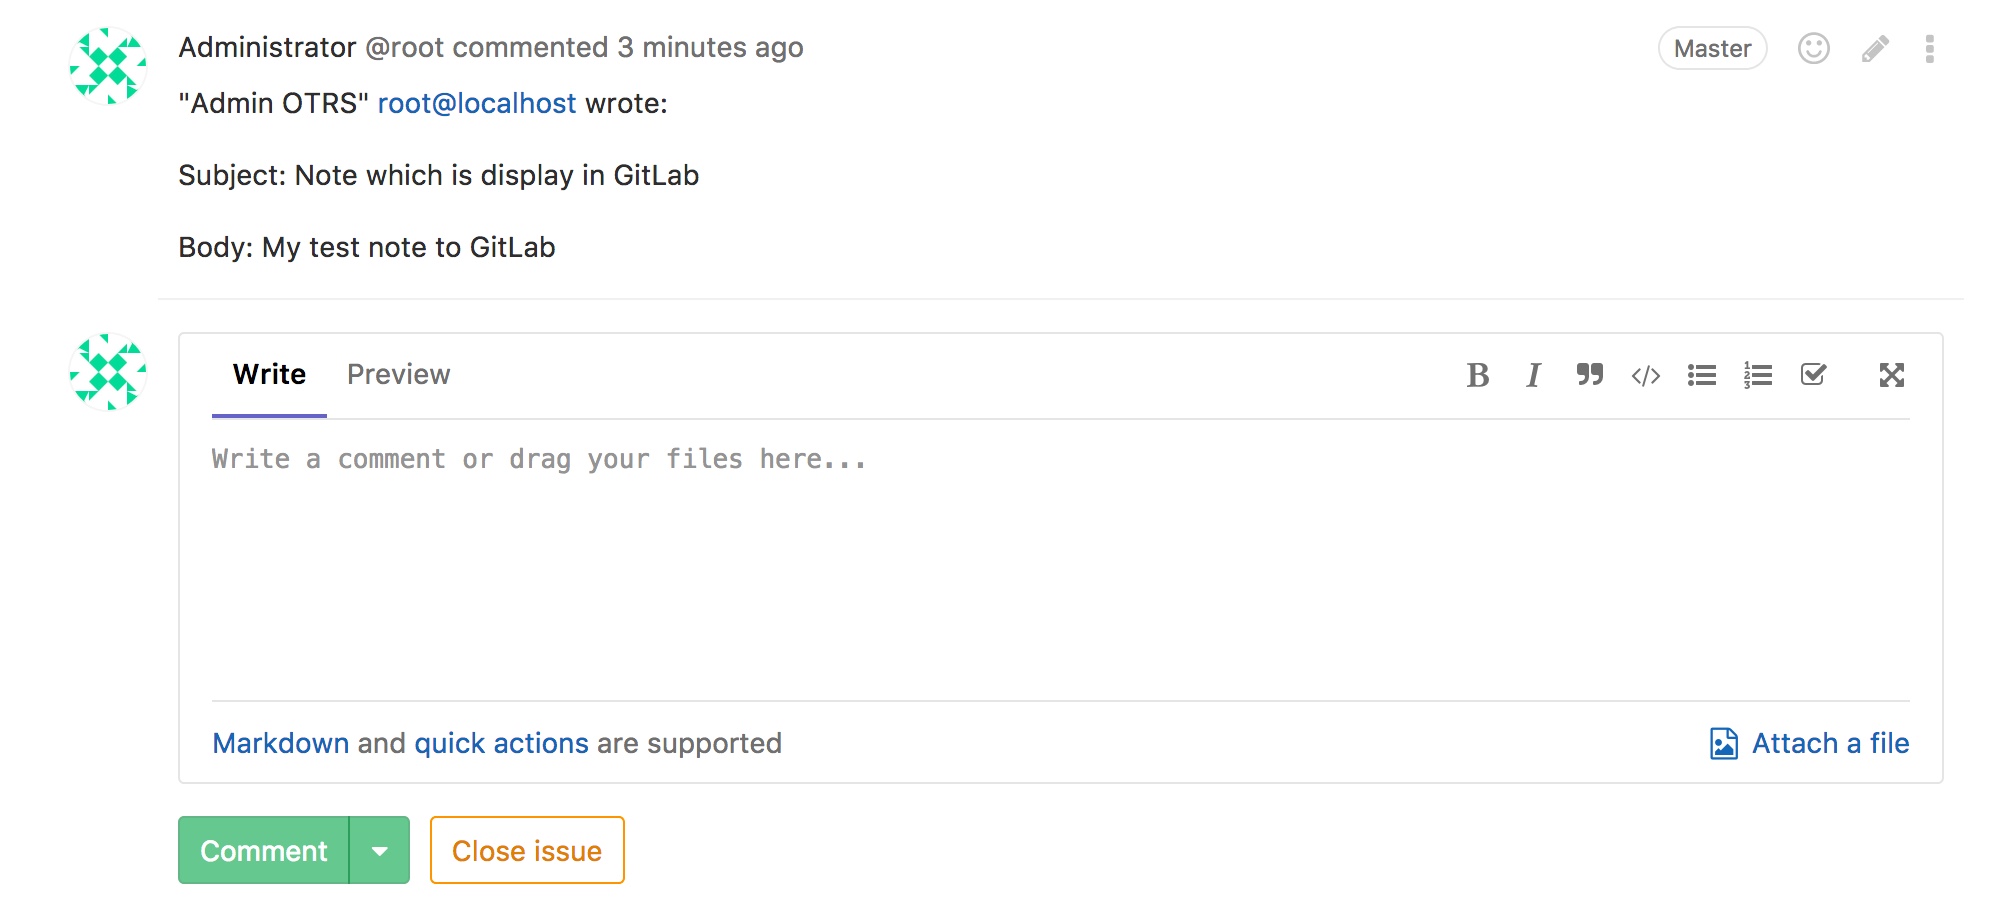
And the last the Invoker is “NoteCreate”:

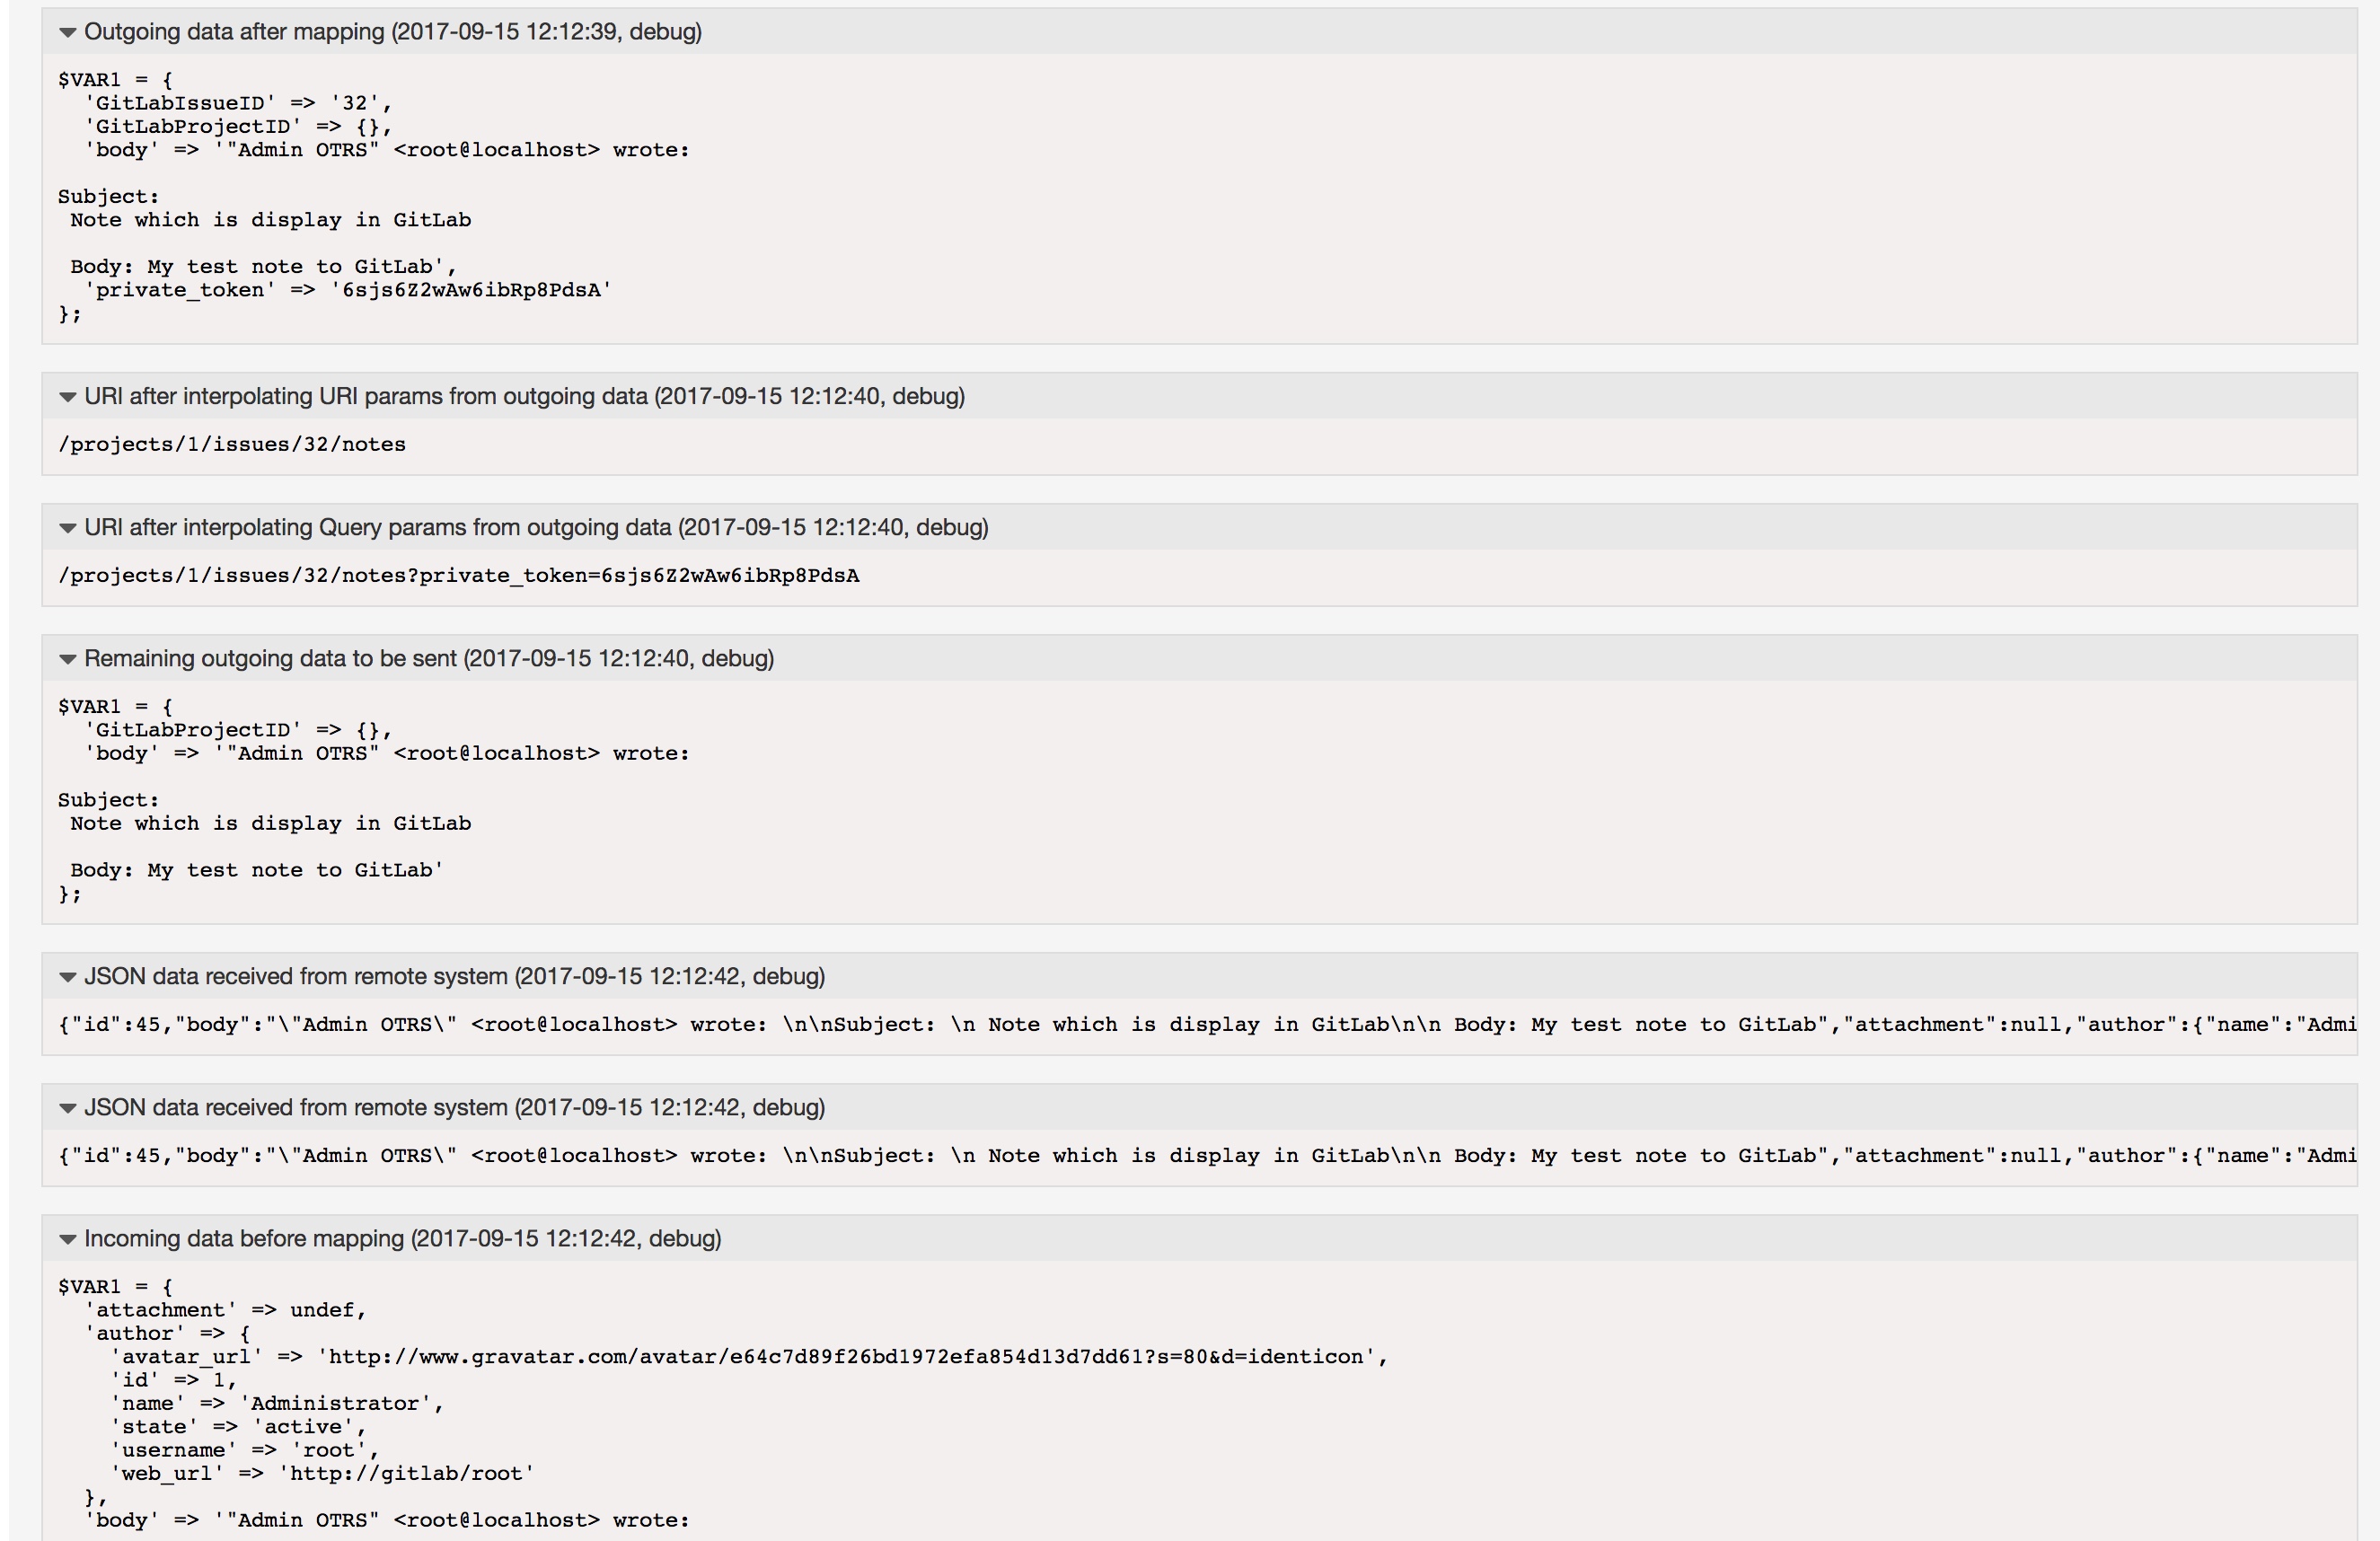
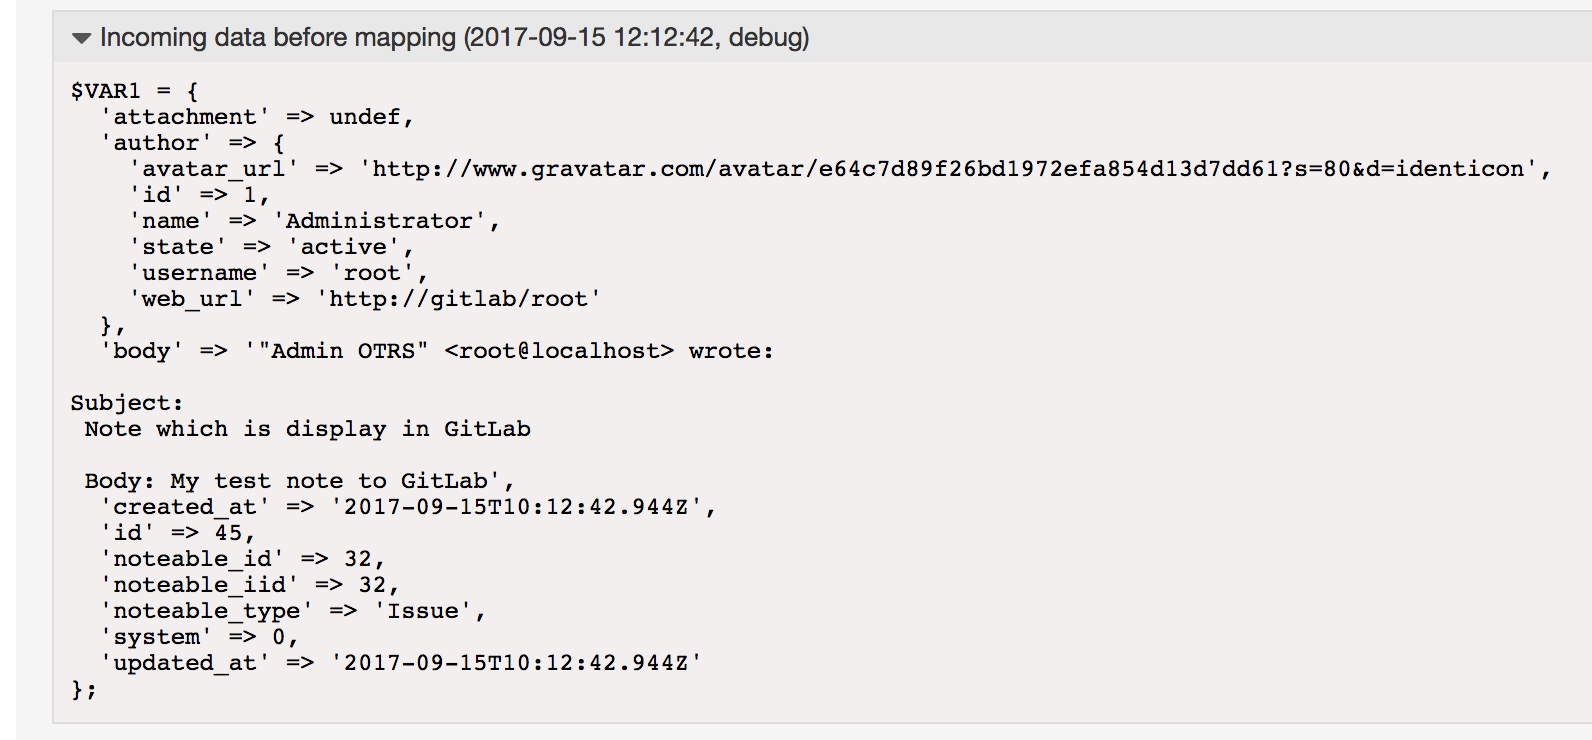
You can now see that the Note was created in GitLab:
More information about the GitLab API
You can also use other resources which are provided by the GitLab API.
If you need more information, please go to the following website: https://docs.gitlab.com/ee/api/README.html