How to connect OTRS with PagerDuty
Robert Ullrich19. Apr 2017 | ConsultingUse cases
Disclaimer:
The practical examples presented in our technical blog (blog.otrs.com) and now in the expert category in our FAQ blog section serve as a source of ideas and documentation to show what is theoretically possible with OTRS in concrete scenarios or sometimes even for more exotic configurations. All configurations presented here were developed under laboratory conditions as a proof of concept.
We can only guarantee testing and implementation of these concepts to be error-free and productive if implemented in a workshop with one of our OTRS consultants. Without this, the responsibility lies with the customer himself. Please note that configurations from older OTRS versions may not work in the newer ones.
With the OTRS Business Solution™ 5s you have the possibility to create, acknowledge and resolve incidents in PagerDuty. The following article will explain how to configure the PagerDutyConnector to establish a connection between OTRS and PagerDuty.
To complete this Howto you need a PagerDuty account. Furthermore you need to configure a new service with the Integration Type “Use our API directly”. After that you’re ready to create Incidents via webservice in Pagerduty. ;-)
OTRS Requirements for this HowTo:
OTRS Framework
The following OTRS framework is required:
- 5.0.x
OTRS Packages
You need the following Freely selectable Features of the OTRS Business Solution™ 5s :
- OTRSGenericInterfaceInvokerTicket
(Adds new invoker for TicketCreate and TicketUpdate in the GenericInterface.)
- OTRSGenericInterfaceInvokerEventFilter
(Contains additional functionalities to add conditions to events of invokers.)
Third Party Software
You need this third party software:
- XML::Simple
- XML::LibXML
- XML::LibXSLT
DynamicFields
- DynamicField „PagerdutyID“ of type „TEXT“
Configuring the “PagerDutyConnector”
When you’re done with the pre-requirements, you have to create a new web service within OTRS. And you need to set up the needed requester invokers.
The name of the new webservice could be “PagerDutyConnector”:
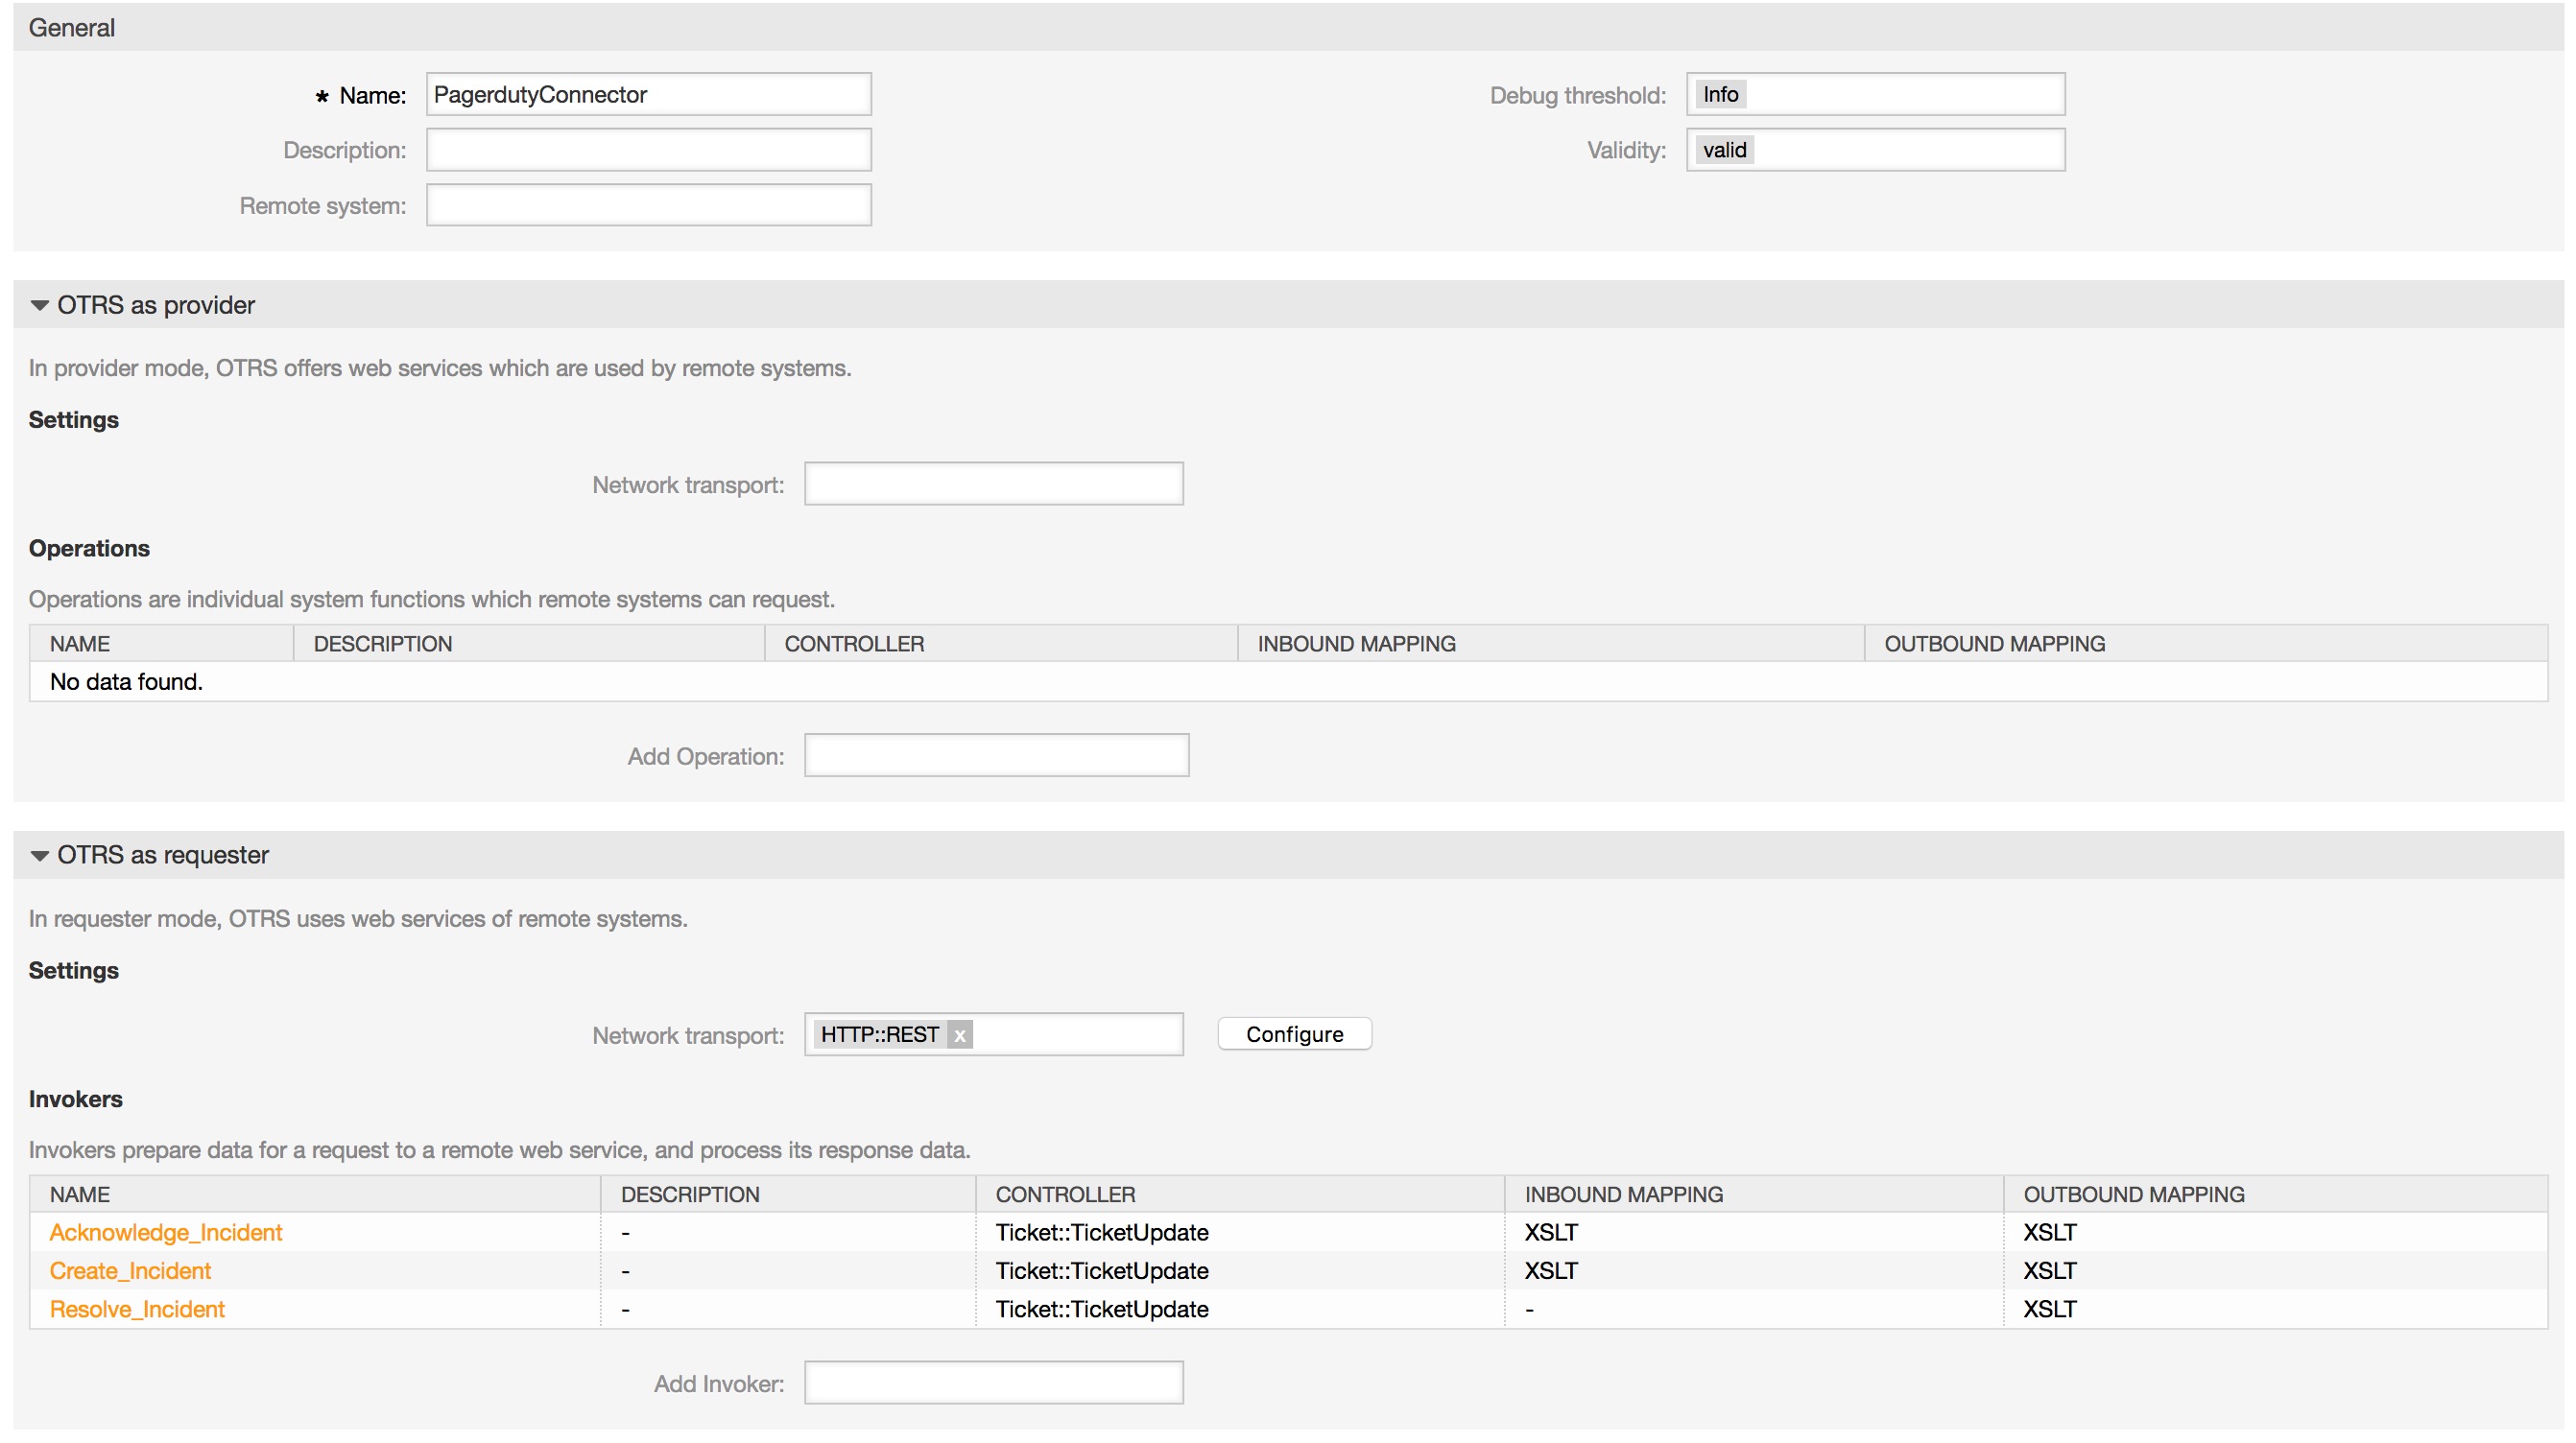
General settings of the PagerdutyConnector
Configuring the Invoker “Create_Incident”
So we’re ready to start configuring our Invokers. The first Invoker is “Create_Incident”. Select all the needed data for your outgoing requests and use “XSLT” as a mapping for your outgoing data.

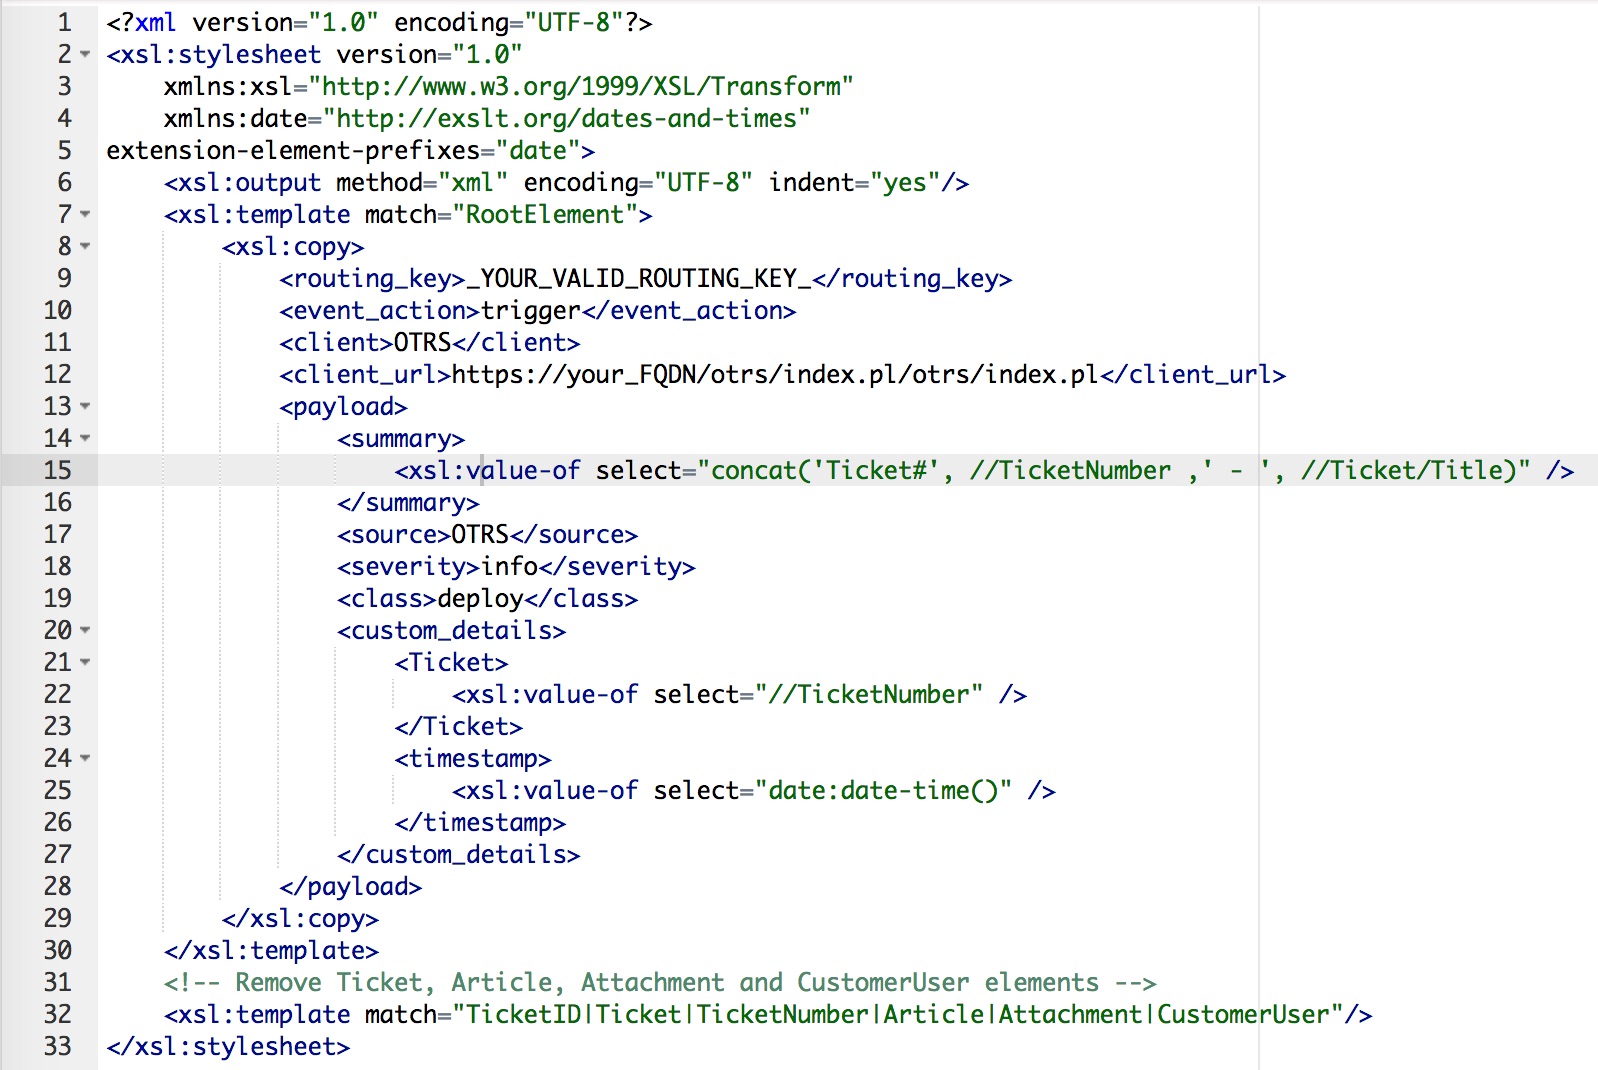
If you need a working XSLT-mapping, you can use the attached one. The only thing you have to add is your personal “routing_key”.
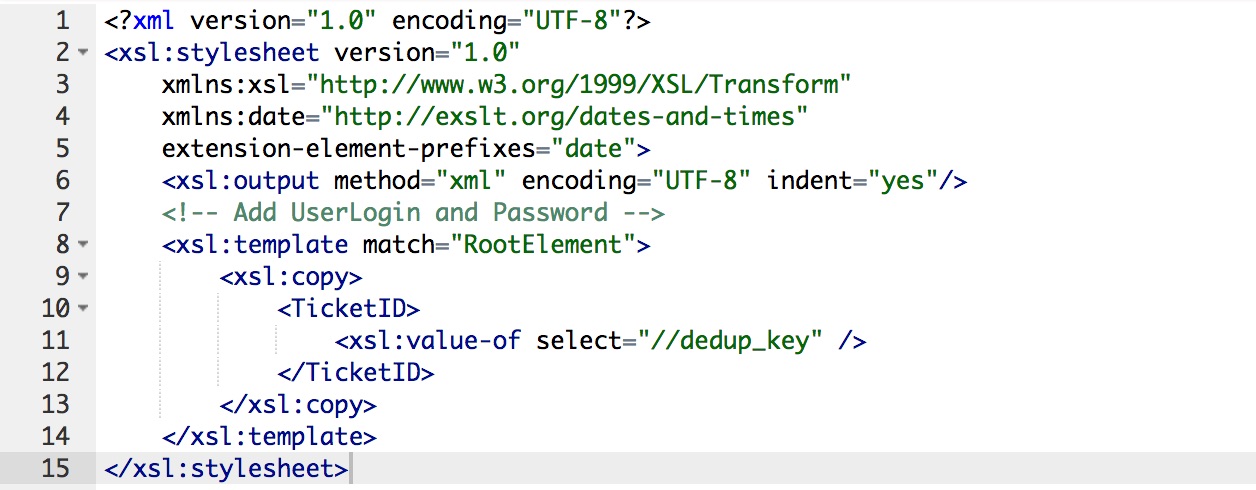
You also need a XSLT-mapping for the incoming response data, because we need to store the “dedup_key”. Use my mapping, if you need a working example.
Last point for this invoker is the used “Event trigger”. Just select one and you’re done with the first Invoker.
Configuring the Invoker “Acknowledge_Incident”
The next invoker is “Acknowledge_Incident”. Select all the needed data for your outgoing requests and also use “XSLT” as a mapping for your outgoing data.
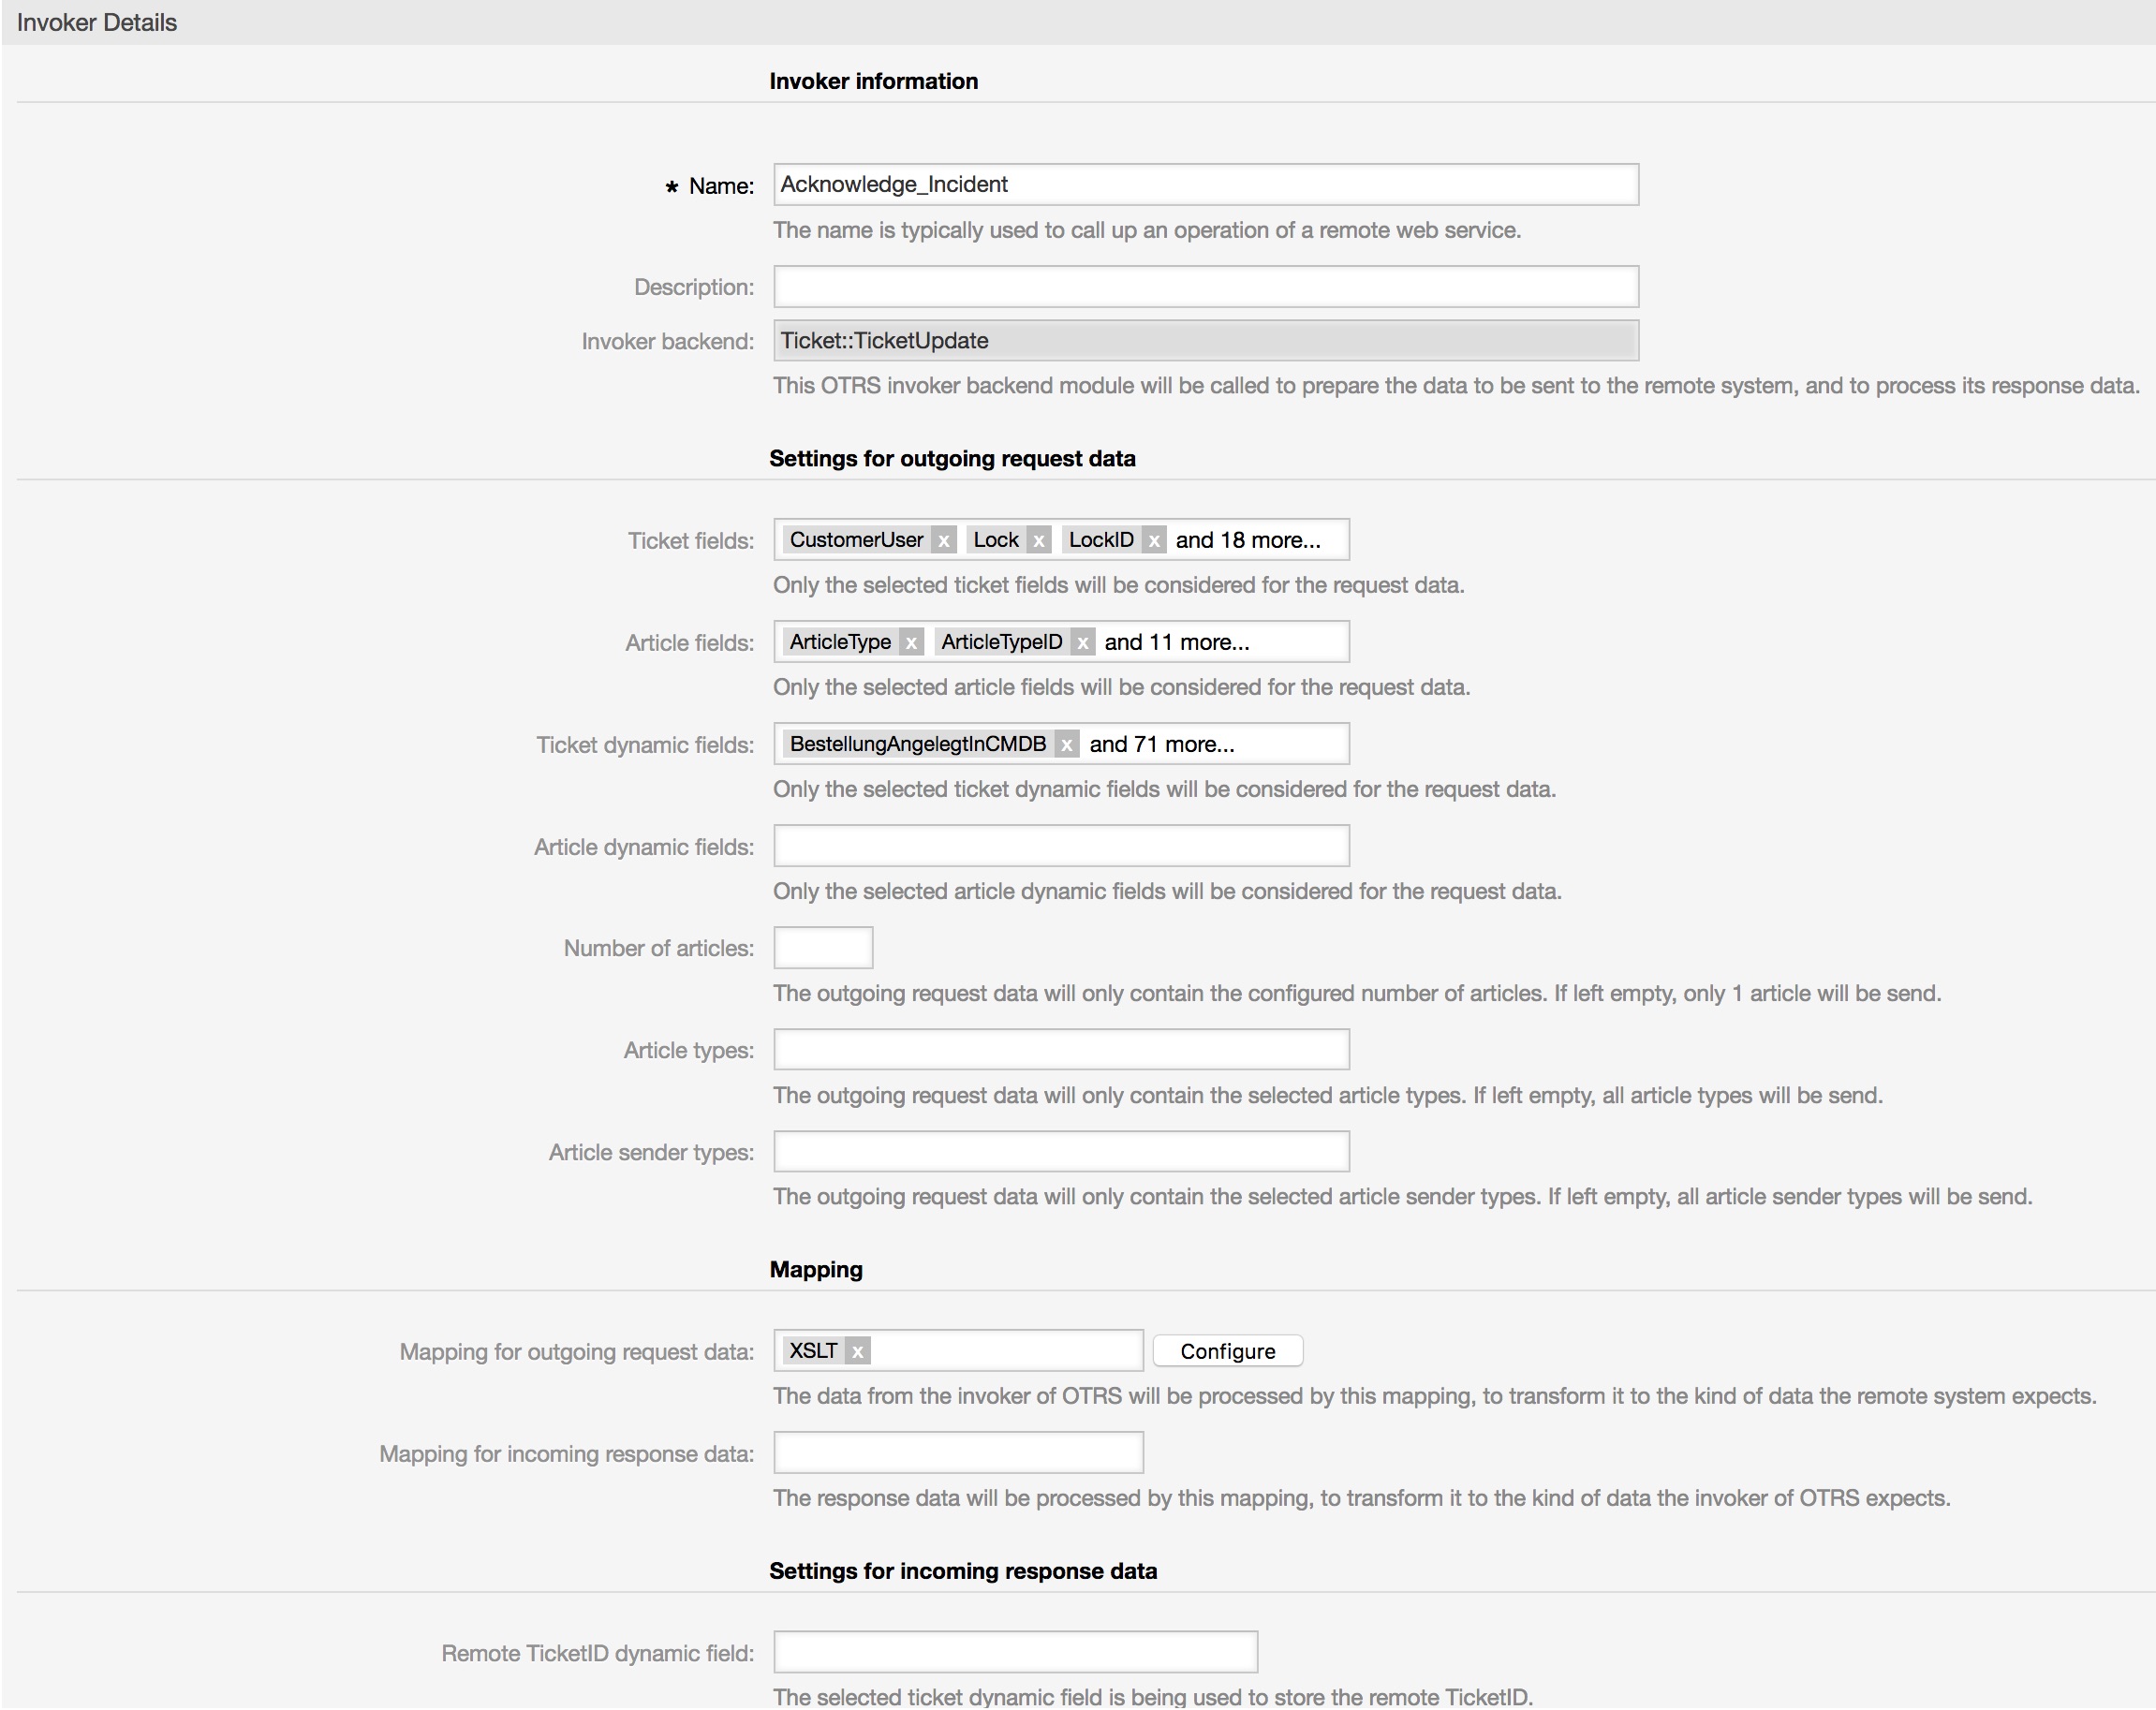
If you need a working XSLT-mapping, you can use the attached mapping. As before you only need your personal “routing_key”.
You don’t need a mapping for the incoming data. PagerDuty only responds with a status, a message and the dedup_key.
Last point for this invoker is the used “Event trigger”. Just select one and you’re done with the second Invoker.
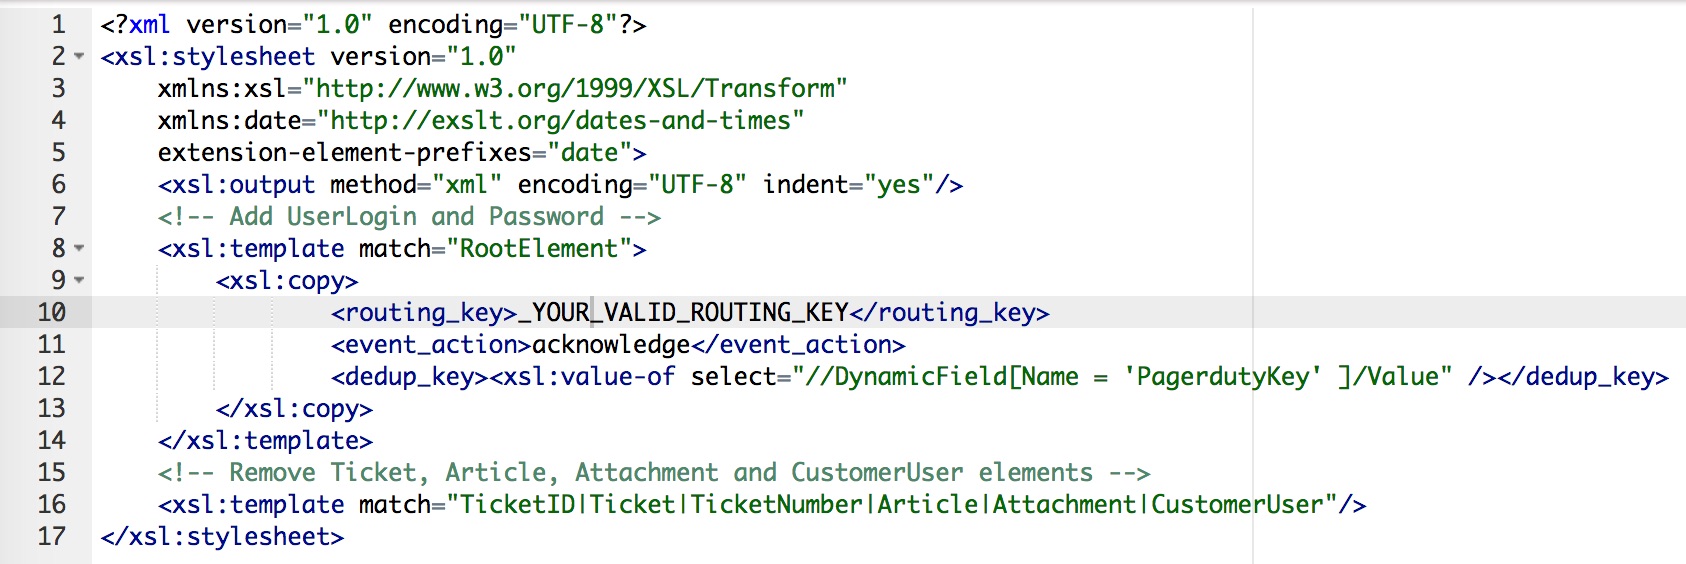
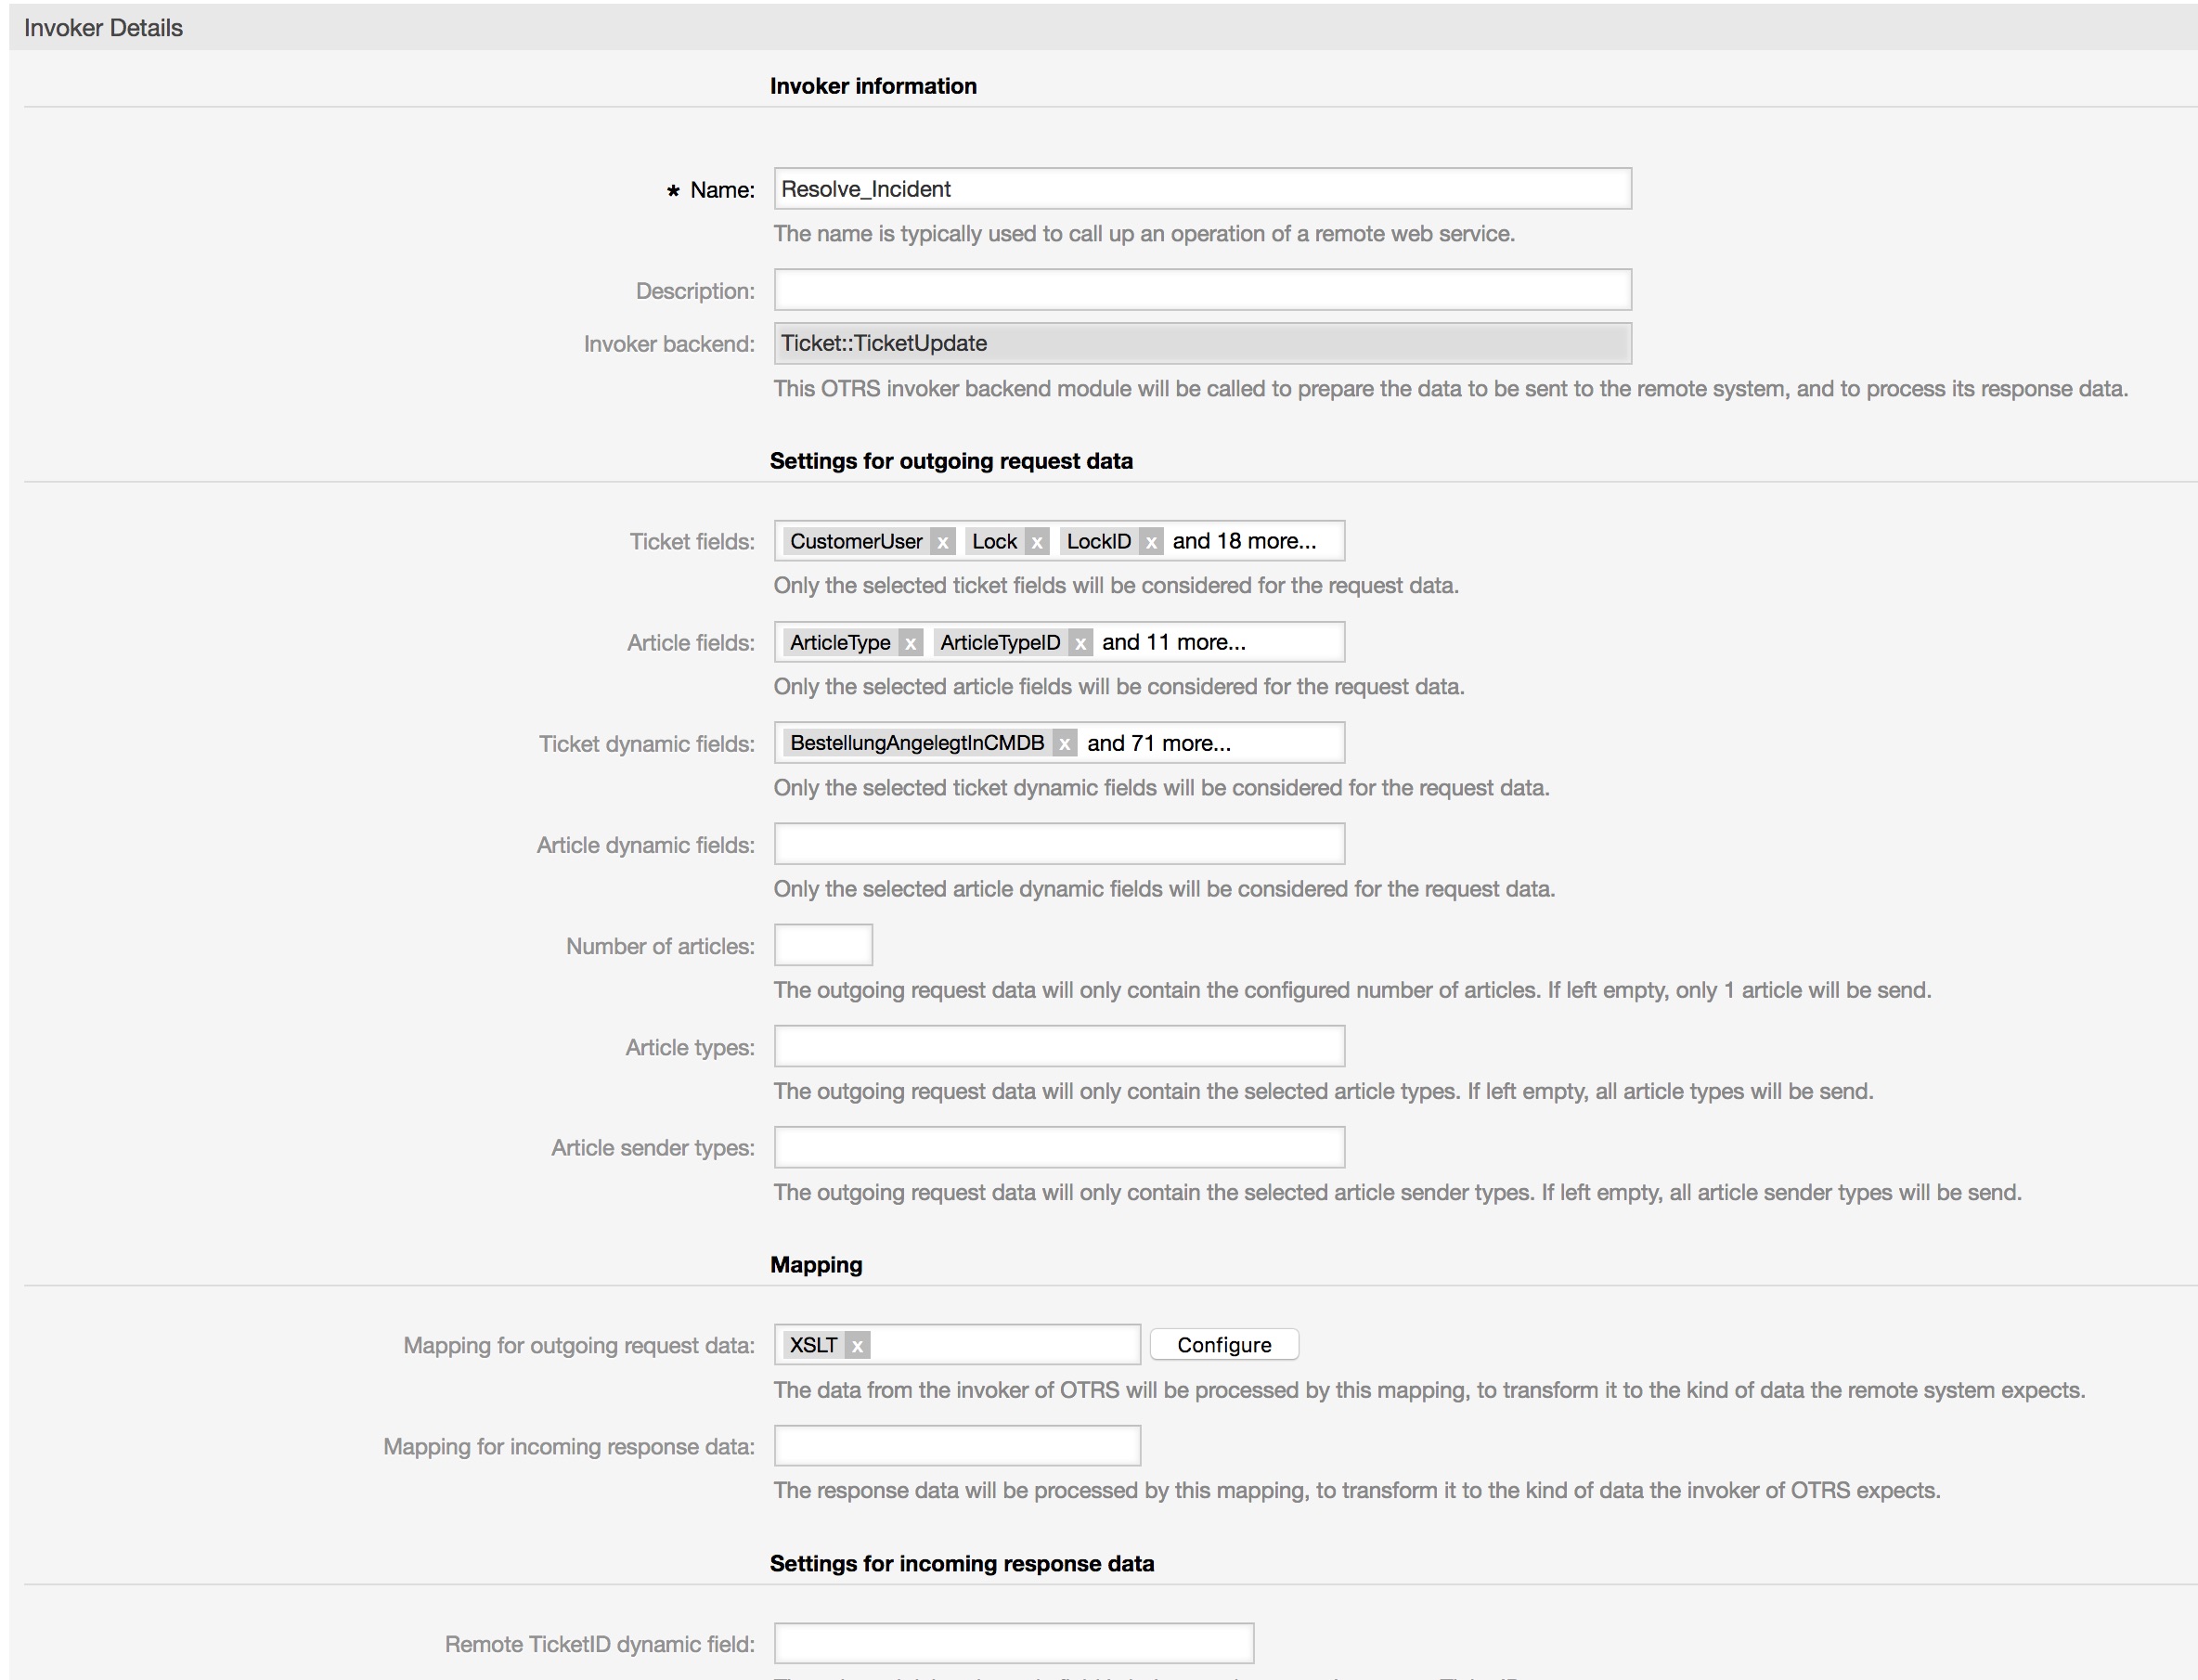
Configuring the Invoker “Resolve_Incident”
The last invoker is “Resolve_Incident”. Select all the needed data for your outgoing requests and also use “XSLT” as a mapping for your outgoing data.
If you need a working XSLT-mapping, you can use the attached mapping. As before you only need your personal “routing_key”.

As before you don’t need a mapping for the incoming data. PagerDuty only responds with the status, a message and the dedup_key.
Last point for this invoker is the used “Event trigger”. Just select one and you’re done with the third & last Invoker.
Configuring the “Network Transport”
Furthermore we need to configure the network transport. But it’s quite easy as you can see:

Afterwards just click on “Save and finish”.
Testing the “PagerDutyConnector”
Finally we can do some tests. Just create or take an already existing ticket and trigger the “Create_Incident” Invoker.
As result you should see something similiar in the OTRS Debugger:
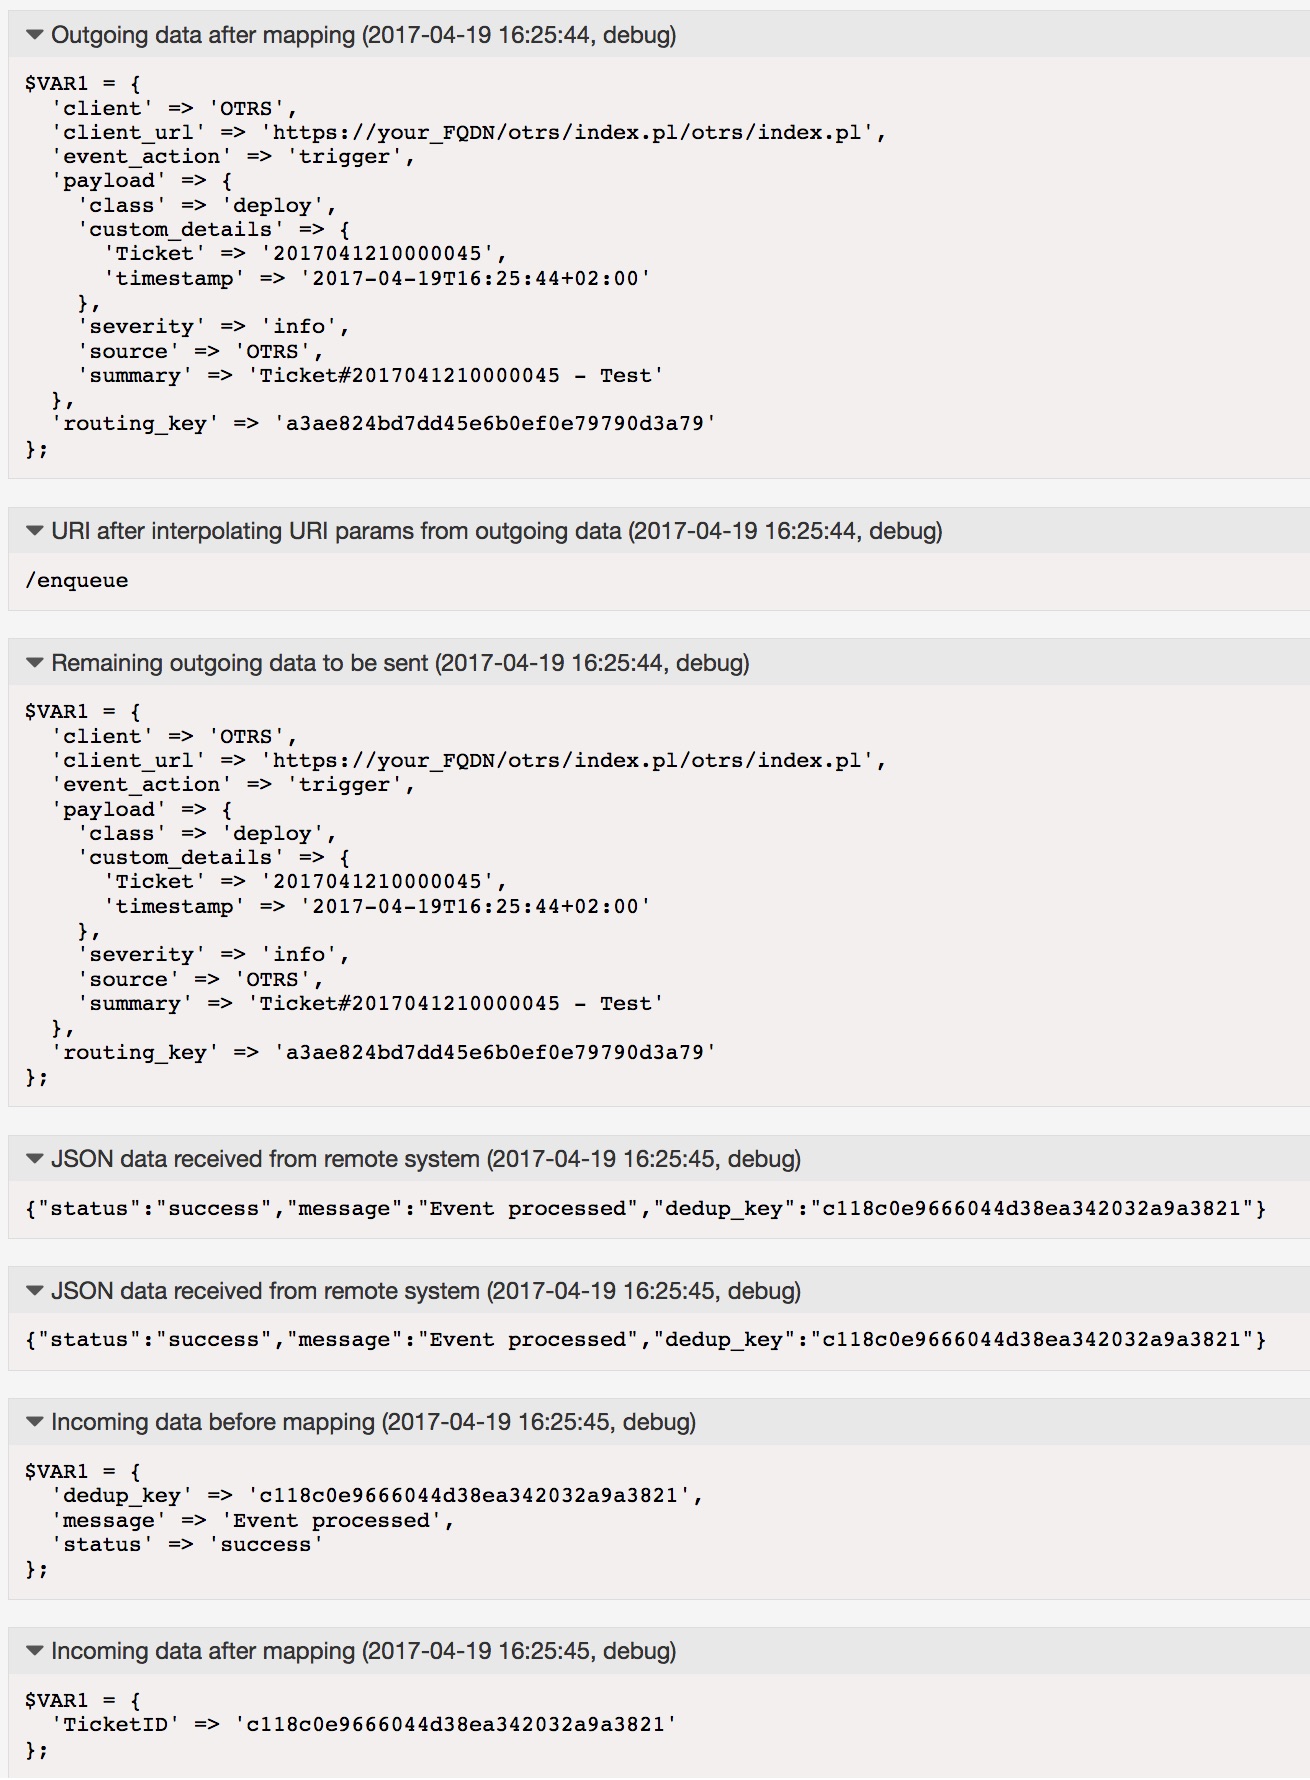
In PagerDuty you’ll now see this Incident:

If we now trigger the Invoker “Acknowledge_Incident” we should receive a status “success”:
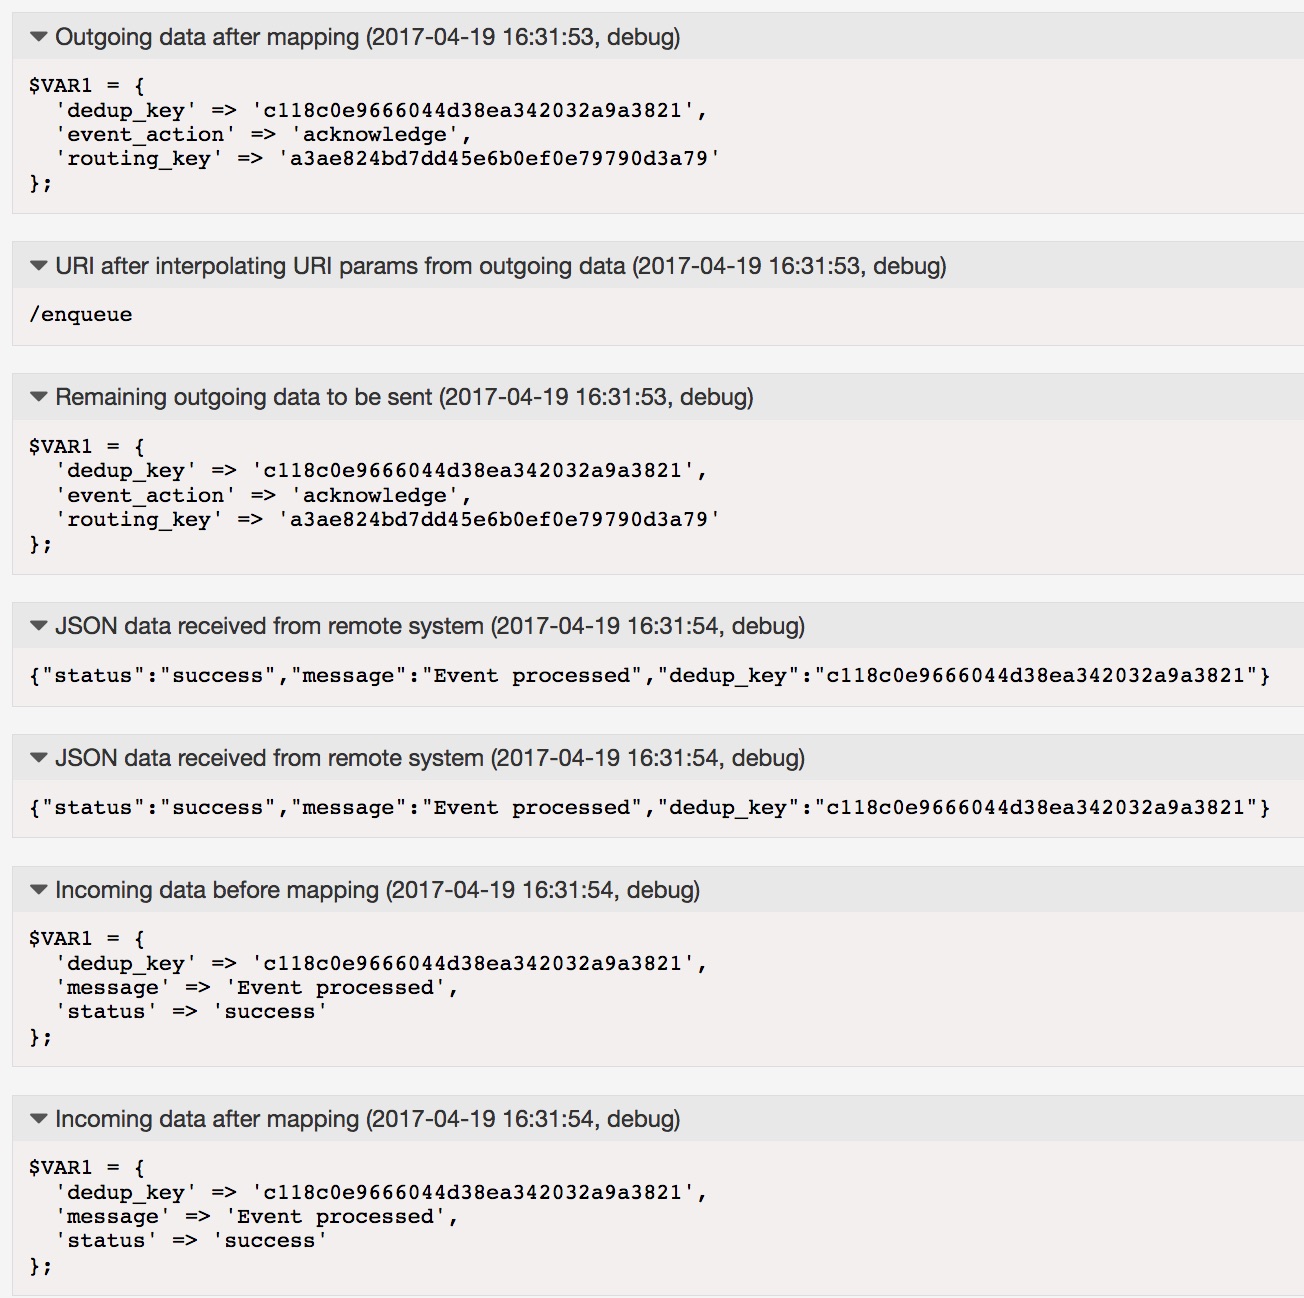
As a result the status changed from “Triggered” to “Acknowledged” in PagerDuty:

And at last the Invoker “Resolve_Incident”:
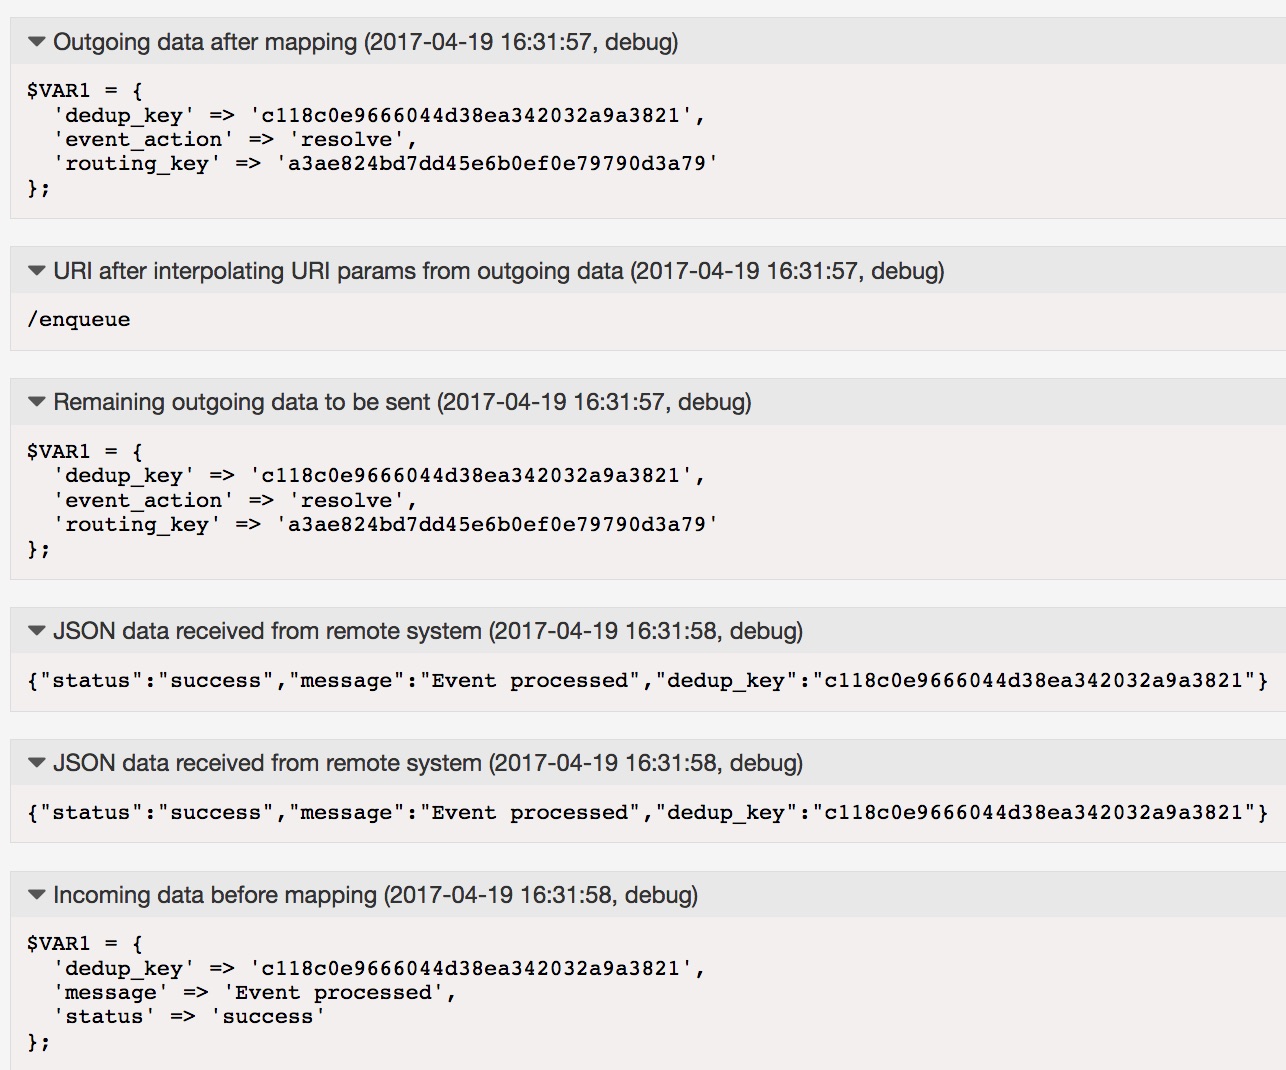
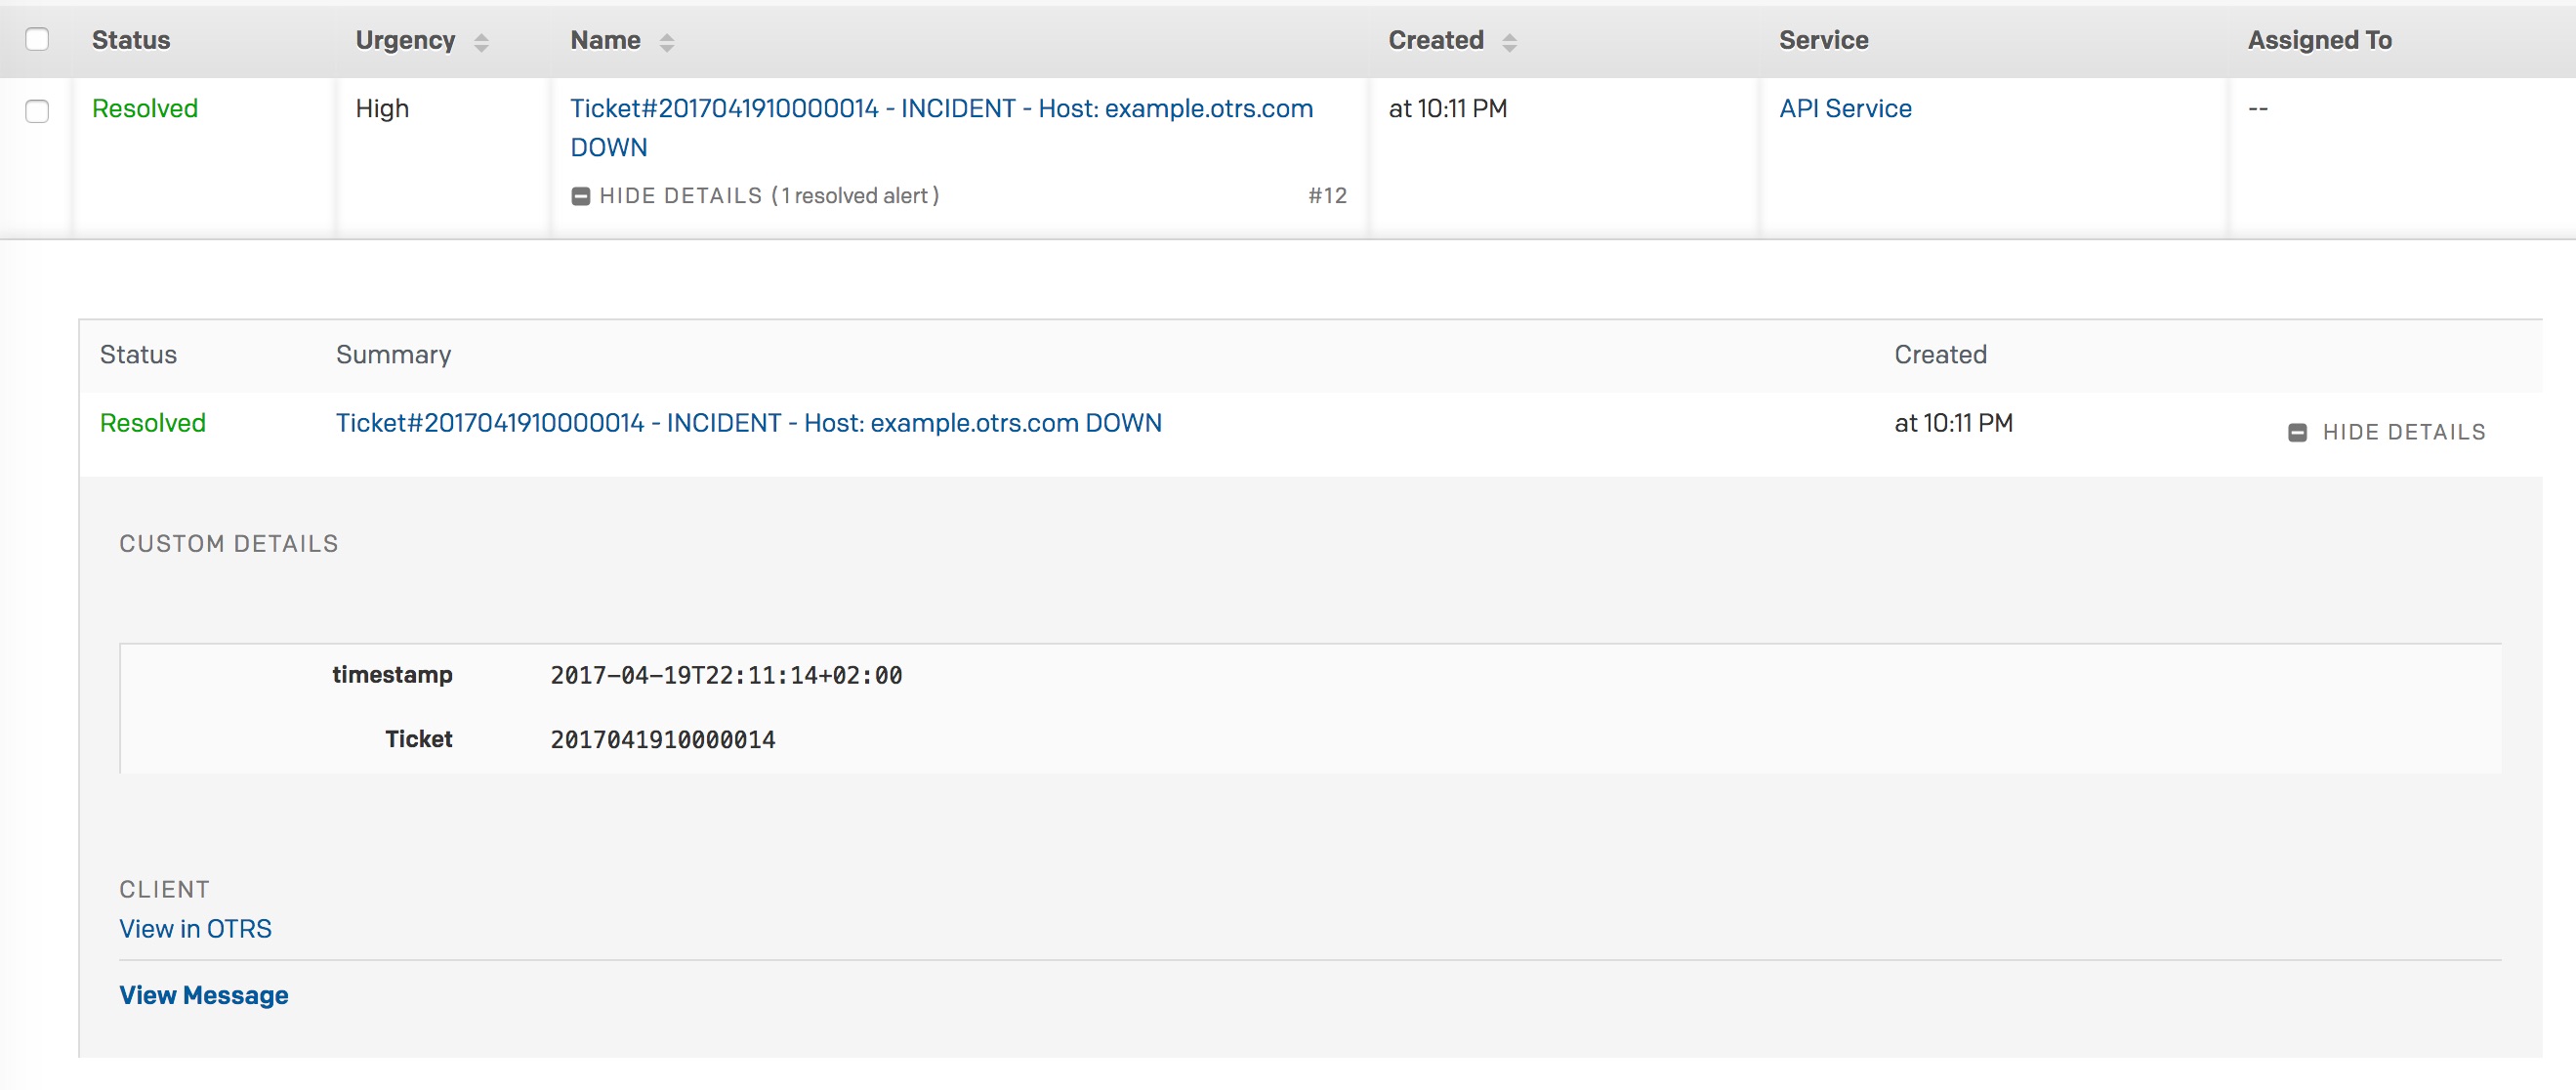
Finally the incident is also “resolved” in PagerDuty:
More information
You can also use other resources which are provided by PagerDuty.
Please go to the following website, if you need more information: https://v2.developer.pagerduty.com/docs/rest-api